From the Artist: How to Make a Real Mobile
http://decor-ideas.org 12/09/2014 00:13 Decor Ideas
I’d like to explain how to make a real mobile. By a “real” mobile, I mean one in which the balance of the different parts depends on those parts, which results in much more interesting dynamics than if you just tie a number of objects to a coat hanger or a horizontal circle.
There are a number of how-to articles for specific mobiles with specific materials, but none of the ones that I’ve come across explain how the balance structure of a real mobile works. I’d like to provide you with a sort of blueprint for mobiles. Once you have that, you can apply it using any materials, whether those are just some random objects you find around your house, objects specific to a season or a holiday, or some midcentury modern shapes.

Here is a large custom mobile I made out of carbon cold-rolled steel and metal rods, influenced by American sculptor Alexander Calder’s groundbreaking mobile designs. He used the same principles in his piece “Snow Flurry” (1940).
With this type of mobile, the balance of the upper parts depends on the weight of the lower parts. Therefore, all mobiles of this type are built from the bottom up, meaning you start with the lowest part of the mobile first.
Materials and tools:
Steel wire (18-, 16- or 14-gauge)Fishing line or swivels (optional)Material for shaped pieces (poster board, plastic sheeting, aluminum flashing, sheet metal etc.)Scissors and tin snipsNeedle-nose pliersDrill (3/64 drill bit to make holes for 18-gauge wire, 1/16 for 16-gauge wire, 5/64 for 14-gauge wire)
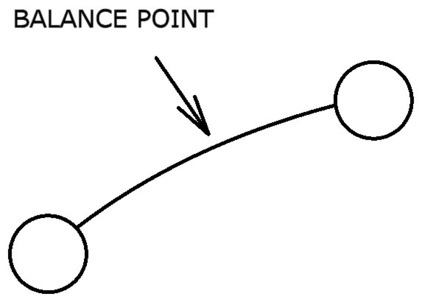
1. Take two objects and connect them with an arm (a piece of wire, a stick or whatever you choose). Find the balance point on that arm. You can find it by simply holding the arm between your finger and thumb and adjusting their position as needed. If you’d like to be more exact, tie a string to the arm and move the string to the left and right until it strikes the balance you’re after.
Steel wire works well for the arms. Most hardware stores sell it in rolls of 100 feet for less than $10 per roll. If you’re making a small mobile with light attachments, you should be fine with an 18-gauge roll. If you’ll be making your mobile a little bigger, use 16- or 14-gauge wire (the smaller the gauge number, the thicker the wire).
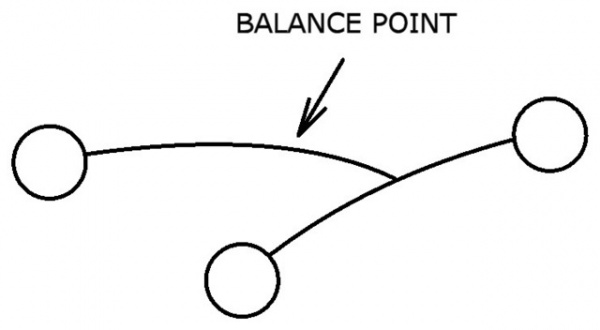
2. Attach a second arm with one object at the end to the balance point you just found on the first part. See how next.
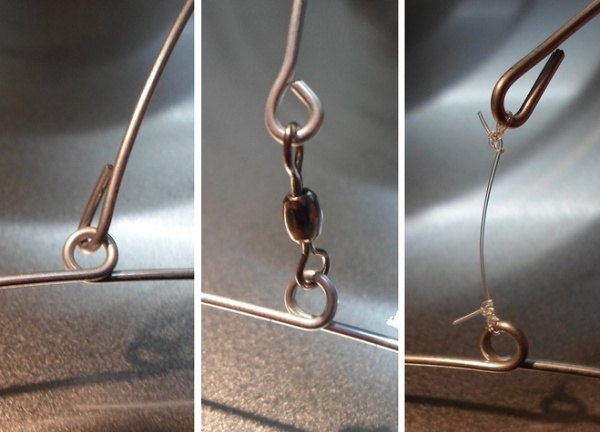
Joining arms: If you’re using wire for the arms, there are a few ways to connect them. You can just loop them into each other (left), or you can connect them with strings (right) or swivels (center) if you’d like the separate parts to be able to rotate. Regular fishing line or fishing swivels will do, and you can get them at any outdoor-sports store.
I make the loops by wrapping the wire around a pair of needle-nose pliers. A round-nosed pair works best (more often available at craft stores than at hardware stores), but you can make good loops with a pair of the more common flat-nosed pliers too.
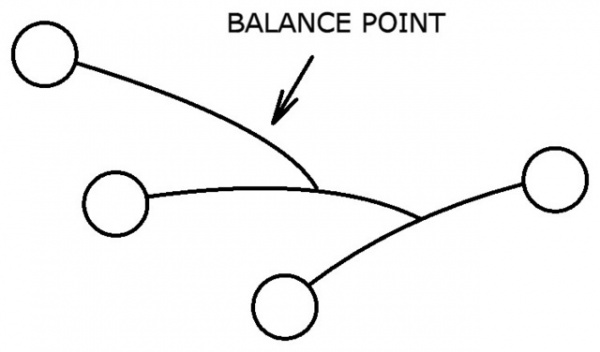
3. Find the balance point on the arm of that second part using the methods described before. Make the third part with one object and one arm and connect it to the balance point on the second part.
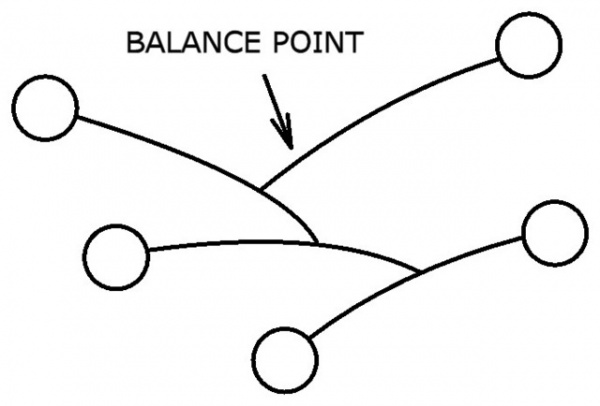
4. Keep going up this way, making more parts and connecting them to the balance point below. You can attach them so they all point in the same direction, alternate them left and right, or arrange them in a random pattern. Do whatever you think looks good.
Tip: I put the mobile on a hook hanging from the ceiling as I work on it. I make a new part for the mobile, then I take the mobile down from the hook, attach the new part to the mobile, then put the mobile back on the hook. And so on.
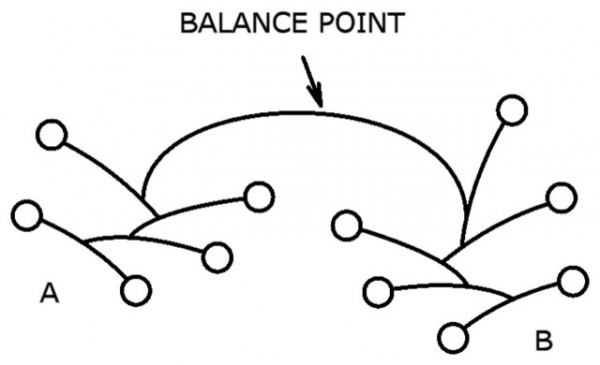
5. Now let’s look at a variation similar to Calder’s “Snow Flurry.” It’s based on basically the same principle that we’ve been using. You make two separate assemblages, labeled A and B here. Then you connect the two at each of their balance points and find the new balance point on that connecting arm.

You can keep going up from there.
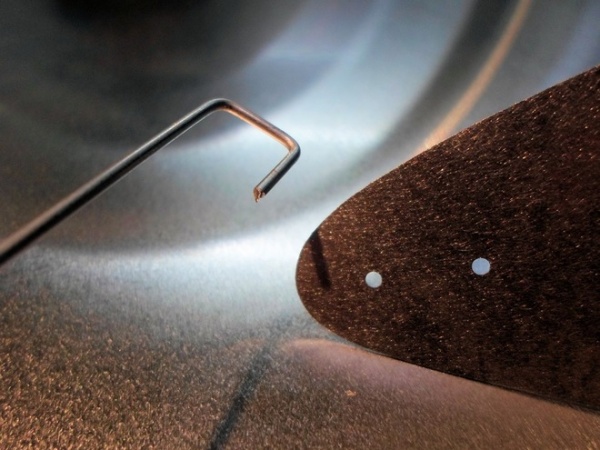
Attaching objects to arms: If you’re attaching flat shaped pieces to the end of the arms (whether they’re made of poster board, plastic sheeting, aluminum flashing, sheet metal etc.), one way to attach them is by making two holes in the piece. Then bend the end of a piece of wire into a rectangular hook that fits the distance of the two holes.
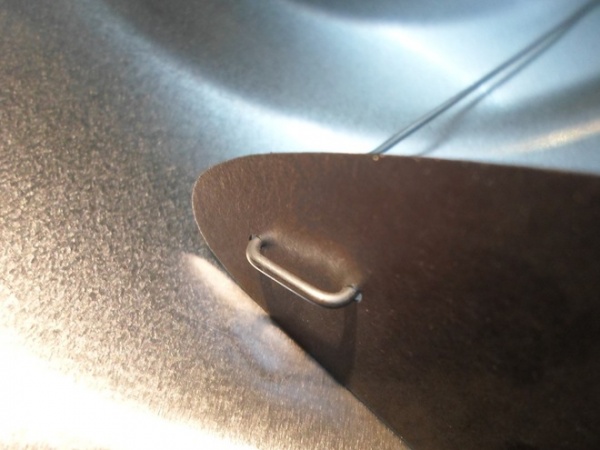
Loop the hook into the holes.
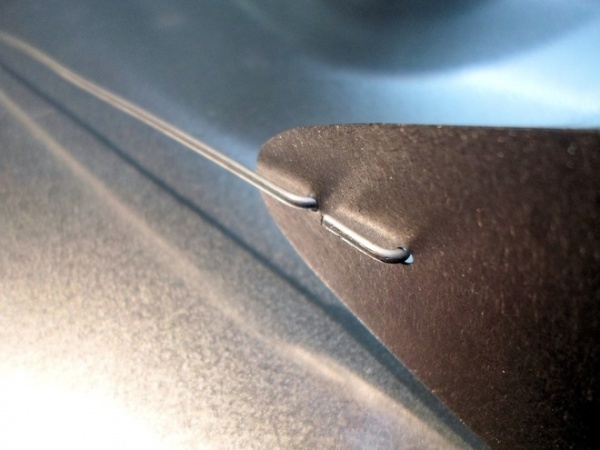
Then bend the wire flat to the piece as shown.

Now you have a basic understanding of how a real mobile works. Time to experiment and have fun. Look at other mobile designs and get inspired. I made all of the mobiles in this composite photo, and they are all based on the same balance structure discussed here. The possibilities are infinite.
Tell us: Have you dabbled in mobile making? Please post a photo of your project in the Comments below.
Related Articles Recommended


