Geek Lab: How to Make an Interactive Steampunk Gear Wall
http://decor-ideas.org 11/27/2014 02:13 Decor Ideas
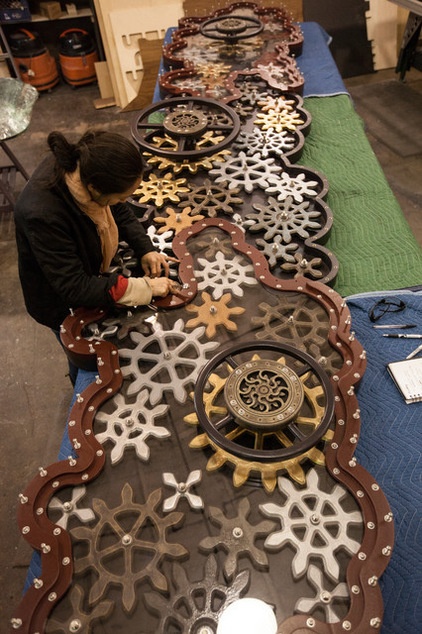
We recently made a large interactive gear display for the Hattiesburg Zoo in Mississippi, and boy, did the adults enjoy it too. And why not? Watching all the gears move together and controlling the motion is fun for everyone.
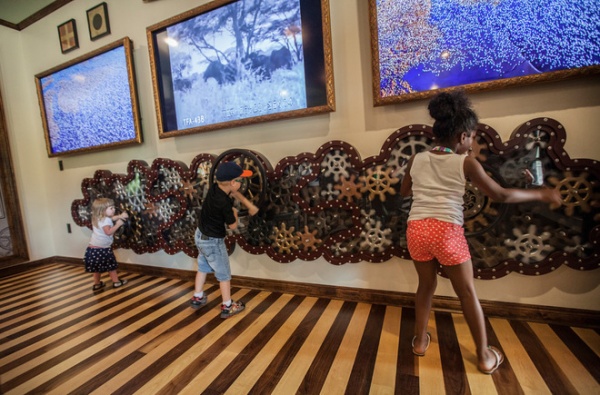
We needed to keep it affordable and robust, so we made the gears out of a 13-ply plywood and then painted them to look like metal. Though we made them for a larger installation, you could just as easily make a smaller installation for your own home. Here’s how.
Materials and tools:
Templates (provided here)¾-inch plywoodMeans of cutting out the wooden gearsPrimerMetallic paints (various colors)Paintbrush (if not using spray paint)Bolts, polyurethane washers, sleeves and acorn nuts
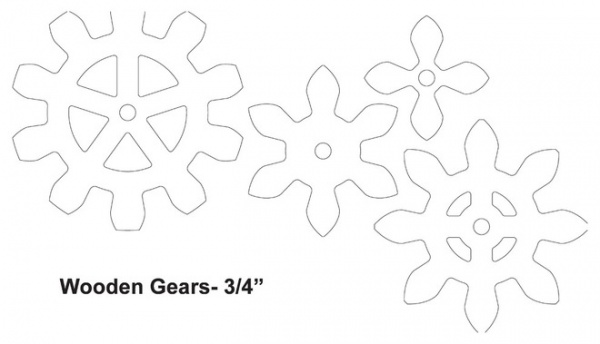
These are the gear templates we used for cutting. You’ll want to lay out your gear pattern so you have an idea of how it will work in your space and how many gears you’ll need. Hover over the image, click the Download button, and print the template to use as a pattern to hand cut your gears or send them to a local CNC (computer numerical control) shop for digital fabrication.
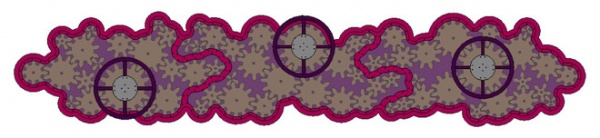
We laid out the gears before assembling them using a CAD program in a design that looked like this. We made them different sizes because we thought that looked cool, but you don’t have to. If you don’t have the tools to do this, you could just place one gear in the center and then work your way out, testing each gear as you go to make sure the gears function together.
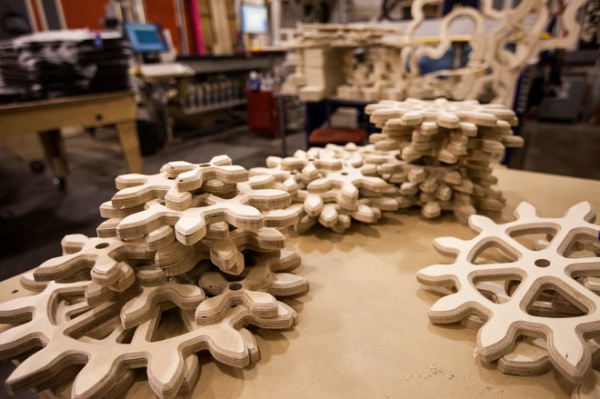
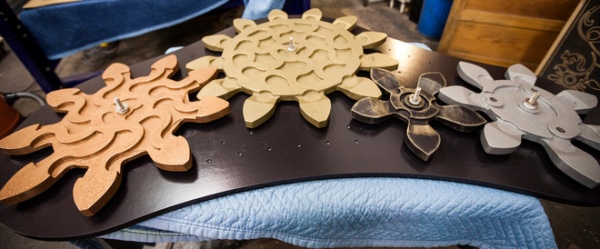
After you have cut your gear shapes out of wood, and before you assemble them into an operational gear system, you’ll want to paint them.
Painting them to make them look like metal is pretty easy and fun. It’s also the most logical thing to do when you’re faced with a pile of wooden gears!

After choosing metallic paints, set up a good painting spot. Having a large table where you can elevate everything you are painting will allow your pieces to dry more quickly. Make sure to wear gloves and a mask if you are working with metallic paint, as it often produces fumes that you won’t want to breathe. And even if you have a mask, make sure the room has good airflow and a fan.
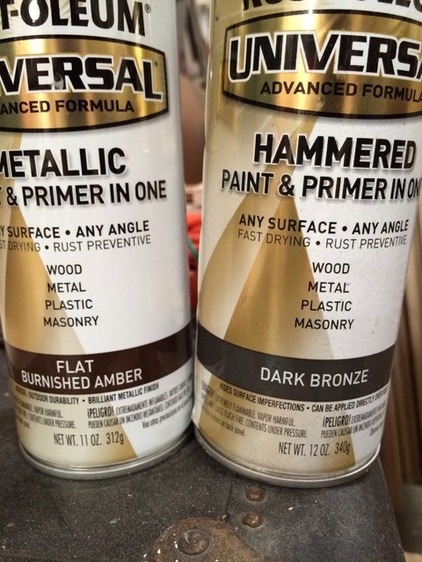
You can get metallic paints in all colors and brands. You can find many in a liquid that has good adhesion and an interesting surface quality. You can also find some in sprays. Make sure to buy the good stuff. The cheaper metallic spray paints tend to leave a thin, unconvincing coat that will ultimately just wipe off. We used Rust-Oleum brand paint for this project.
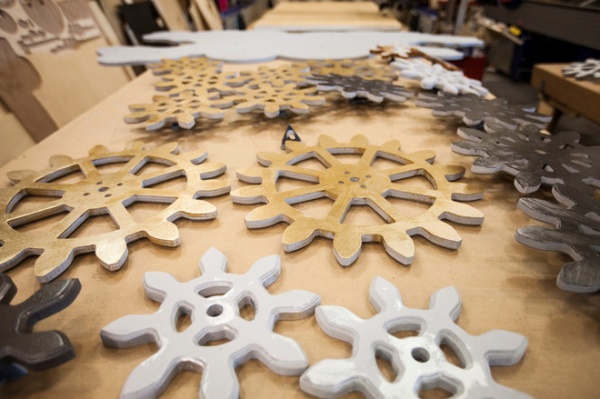
Before you begin painting with the metallic paints, apply a layer of primer. This will make your finish look and adhere better. Paint the back of the each gear first. This will enable you to get your first good coat on the edges, where the paint gets soaked up the most.
Mixing up your painting techniques on the different gears will create a fun, multimetal collage look and add color and interest to your piece. Use liquid paint on some and spray paint on others, and do some interesting things on a few, like faux distressing.
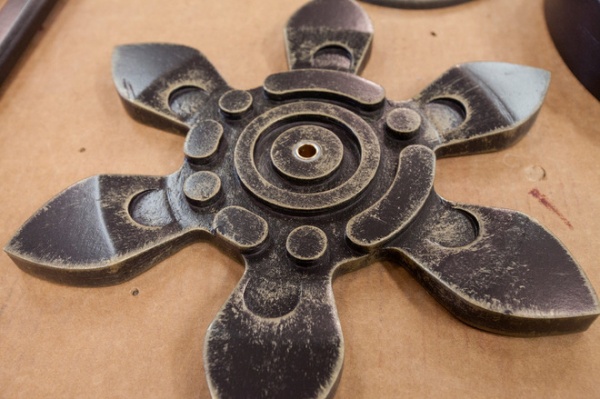
A simple distressed look is easy to do. Paint your gear with a smooth color finish; then, with a contrasting color, use a dry-brush painting technique over the top of it. Dry brushing is exactly what it sounds like. Wet your paint brush with the metallic paint, then on a piece of scrap cardboard or paper, wipe most of the paint off. With your mostly dry paintbrush, lightly paint over the surface of the gear, bringing out the hard edges that define its shape and patterning.
The effect is worth the extra time. And make sure to let the paint dry fully between coats, or you’ll wind up with sticky gears. And that’s no good!
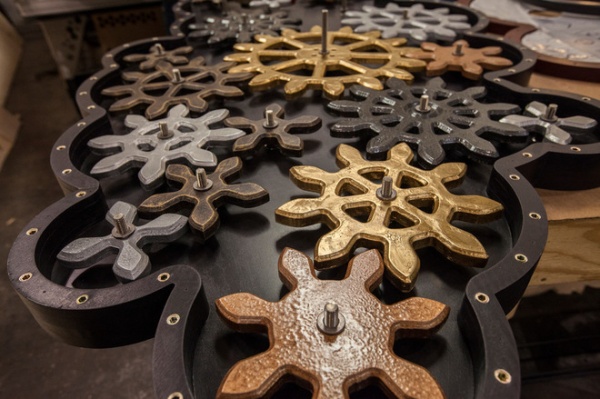
We mounted our gears onto a painted plywood backer. This let us run bolts through the back (through predrilled holes) to slide the gears onto. A plastic sleeve and some washers on both sides of each gear will keep the spinning motion fluid.
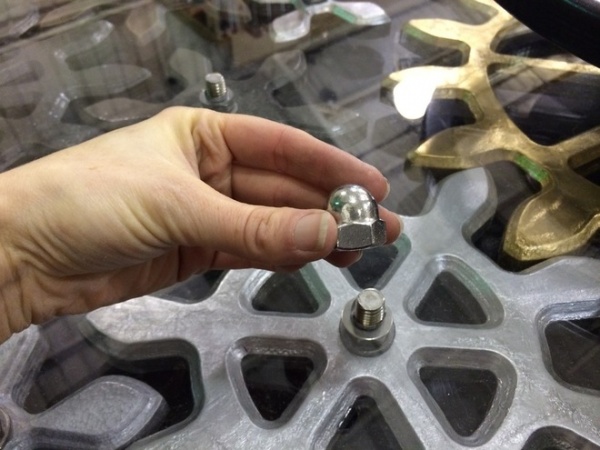
Once your gears are dry, it’s time to assemble them. Since you laid out your gear pattern beforehand (or even if you didn’t), all you need to do is put this thing together. By using acorn nuts and washers on the ends of the bolts, you can get a nice, finished look and still keep the gears loose enough to spin.
In the end you will have a nice collage of gears mounted on a backer that you can attach to anything. Now let’s spin!
Check out this video to see the gears in action:
More: How to Build a Steampunk Cat Transit System
Related Articles Recommended
Related Images Recommend