Make Your Own Mini Advent Village
http://decor-ideas.org 11/26/2014 06:13 Decor Ideas
As the big day approaches, what could be sweeter than opening up a little treat-filled Advent house each morning? Follow this step-by-step guide to create a unique village that will keep the little ones — and not-so-little ones — entertained on the countdown to Christmas.
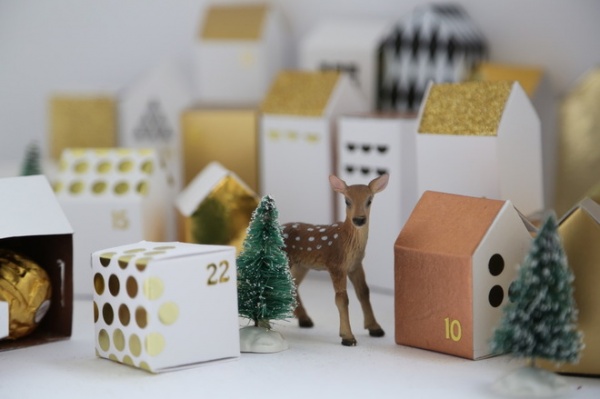
This homes in this Advent village are laced with metallic golden accents to add that all-important Christmas sparkle. But you don’t need to use gold; you can personalize them with festive wrapping paper, stickers, decorative tape — whatever suits your own Christmas theme.
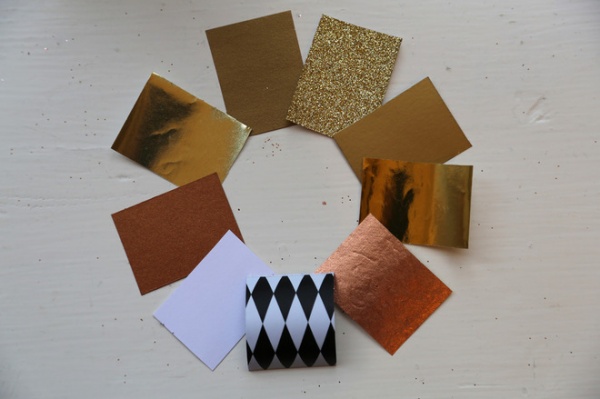
Materials and tools:
Templates (provided below)Craft knife (like X-Acto)13 sheets of letter-size, 24-pound (A4, 90 grams per square meter) white card stockCutting matMetal rulerMetal spoonMetallic paper in gold, copper and bronzeSpray adhesive Metallic spraySquare and circle stickers in black and/or goldScissorsNumber stickersDouble-sided tapeSweets or small gifts to place inside the housesTissue paperMini fir trees, glitter, fake snow and other winter-scene decorations of your choice
See more on U.S./international paper weights
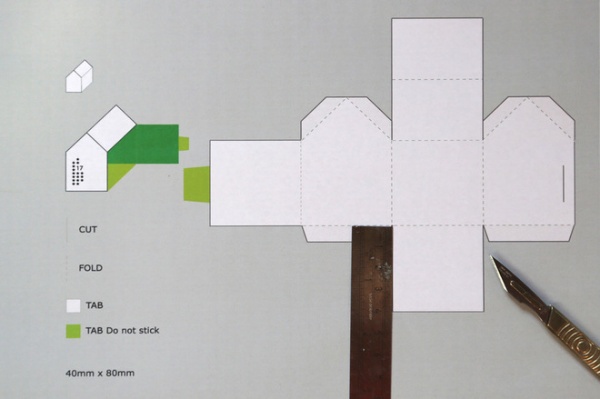
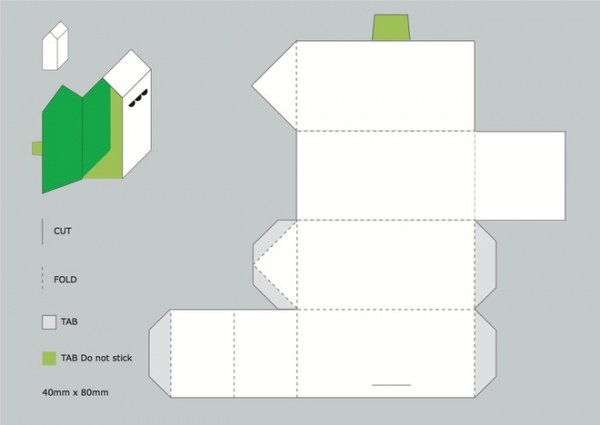
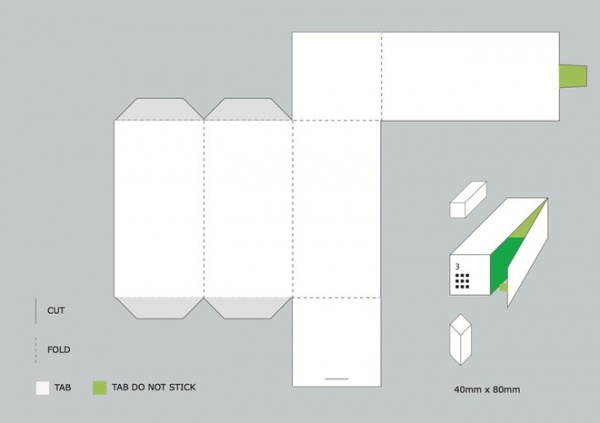
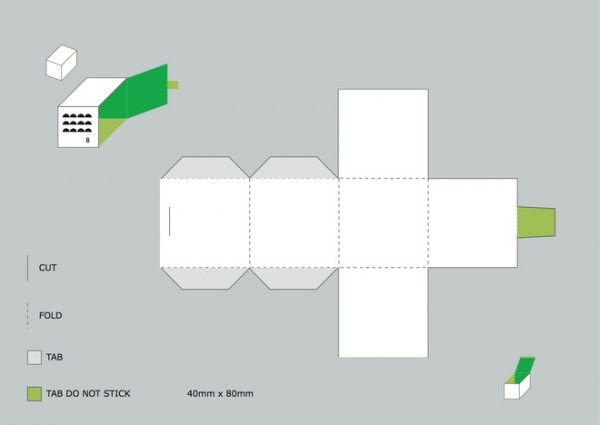
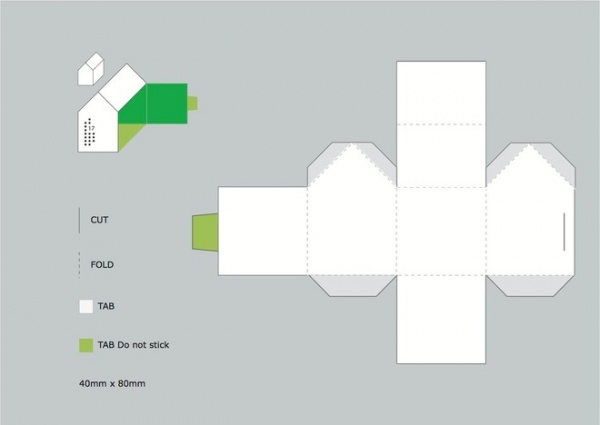
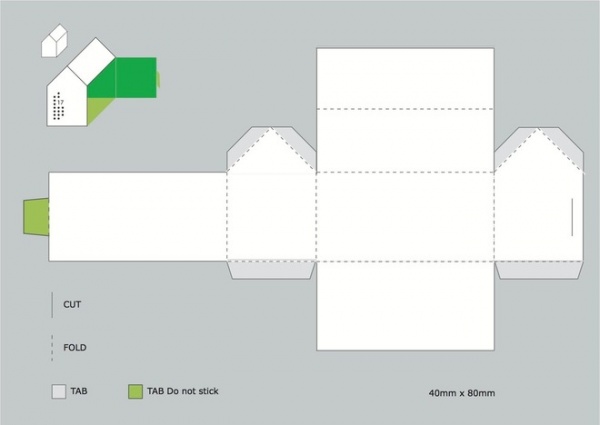
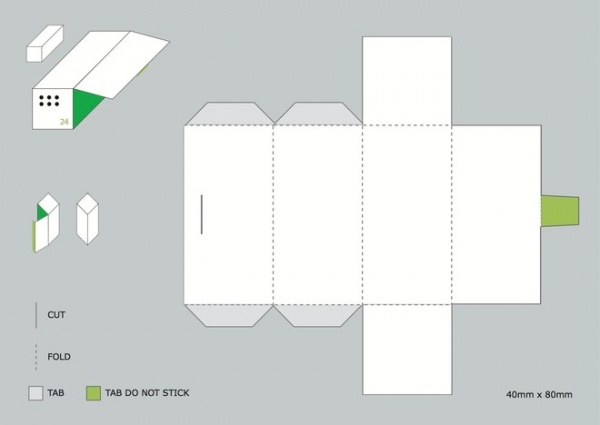
1. Draw templates for the four different styles of houses on paper, using the images at the end of this ideabook. Make a total of 24 houses; how many you make of each shape is up to you.
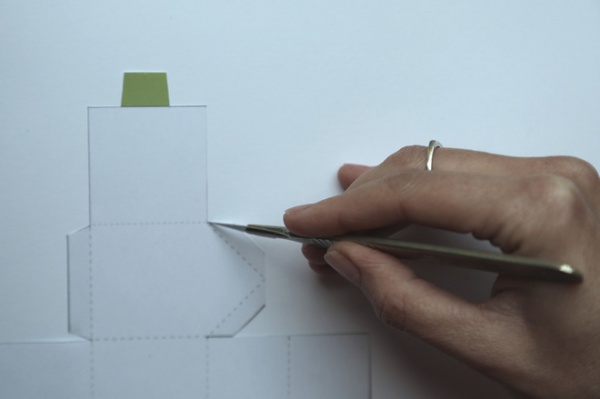
2. Using a craft knife, cut along the bold lines. These are now your templates. Draw carefully around each template onto the card stock, or prick holes in the card stock to mark out the template lines, then cut out the shapes using the craft knife and a metal ruler. Remember to cut the slit for the door tab to fit into for each.
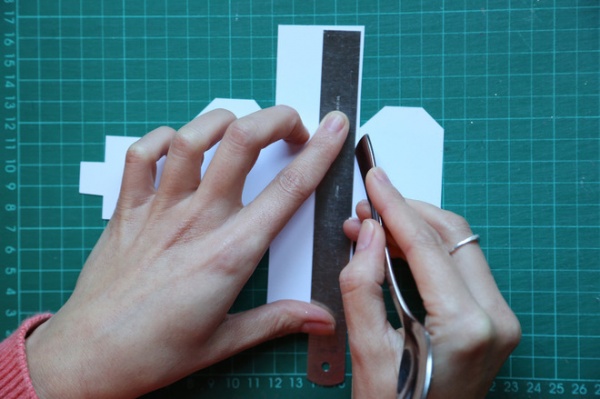
3. Take each cut-out card house and carefully score along the fold lines. I ran the end of a spoon along the edge of a metal ruler to do this.
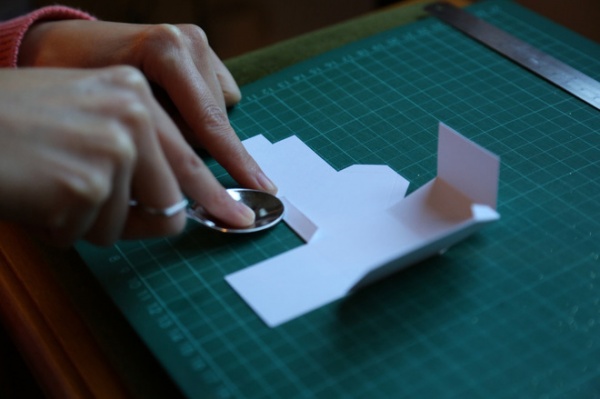
4. Press along each fold for a neat, crisp edge. Again, the back of a spoon can be very effective here.
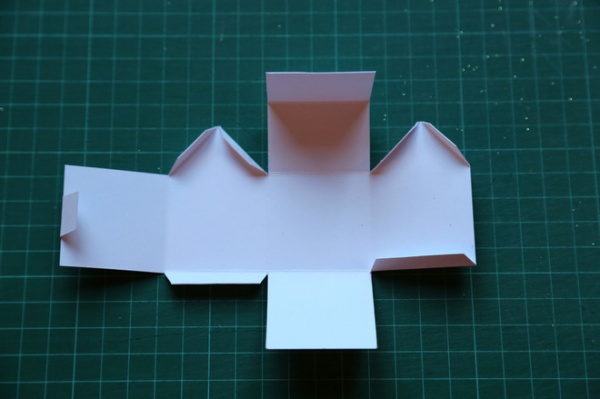
5. You are now ready to decorate the inside of your box. Be as creative as you like, with felt pens, paint or patterned paper cut to size (use the template) and stuck on with spray adhesive for a smooth finish. A variety of finishes will add interest to your village.
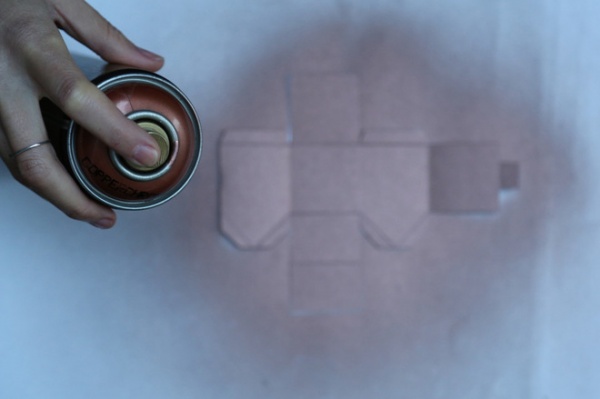
6. For a fast and clean finish, you could use a metallic spray. Outside or in a well-ventilated area, turn the card stock right-side down onto a piece of scrap paper. Evenly spray on your chosen metallic paint (I used a copper spray). Allow to dry. Press along the fold lines once more and turn the paper over.
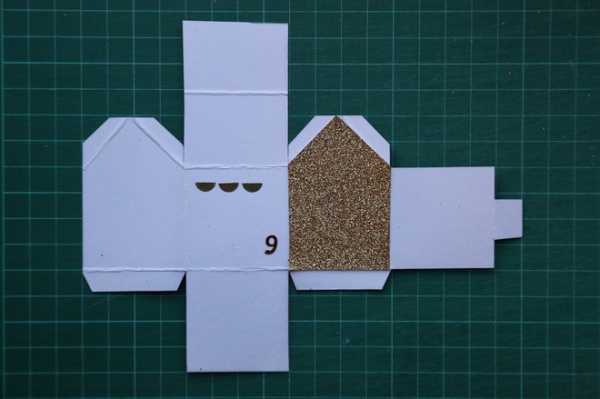
7. Add the finishing details to the outside of your house. Using stickers, apply a small number of rows of black squares, spots or half moons to one or two sides to suggest windows.
Using the template as a guide, cut a variety of metallic papers to size to decorate the sides of your houses. You can measure the square sides (1½ by 1½ inches, or 40 by 40 millimeters) and rectangular sides (1½ by 3 inches, or 40 by 80 millimeters) directly on the metallic papers. Cut the paper out with scissors and stick it onto your houses using a spray adhesive. If the shape covers more than one side, score the fold line on the metallic paper before sticking it on. Smooth these into position and allow to dry.
Then stick the all-important Advent number on the face of the box.
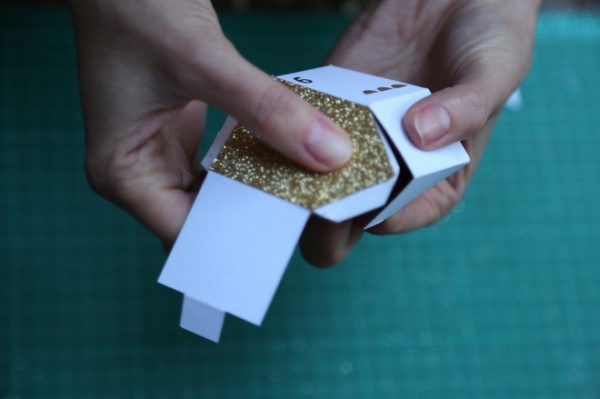
8. Stick double-sided tape along the house tabs to form each house.
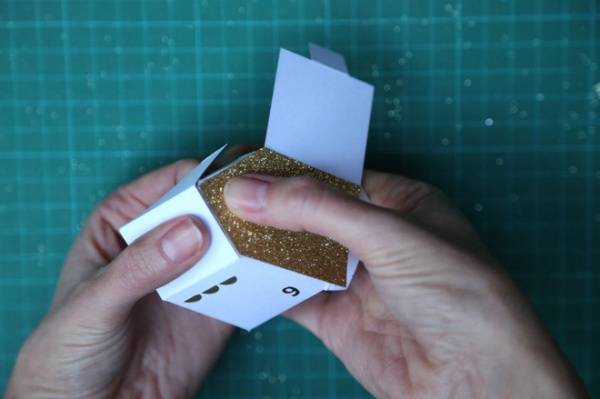
Working your way around the house, press the sticky tabs to the corresponding box sides. Using the end of your spoon, press these down on the inside of the house to secure them.
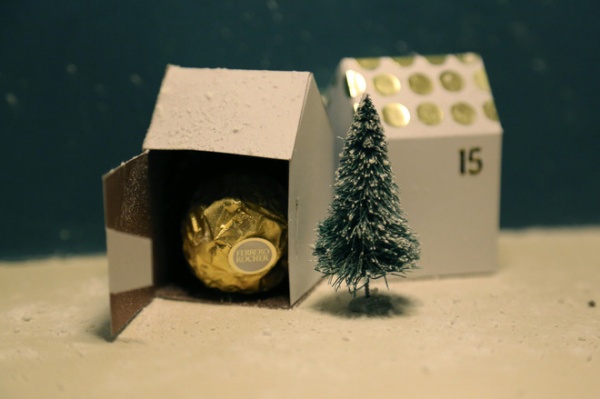
9. With your house complete, you can now have fun hiding a treat inside.
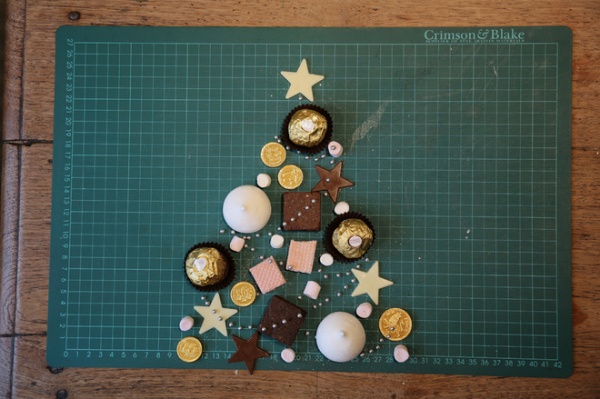
The treats could be sweets, like marshmallows or a chocolate coin, or something small, like a precious shell, a handwritten joke, a toy or a key ring … the possibilities are endless! Individually wrap the treats in tissue paper for an extra-special touch.
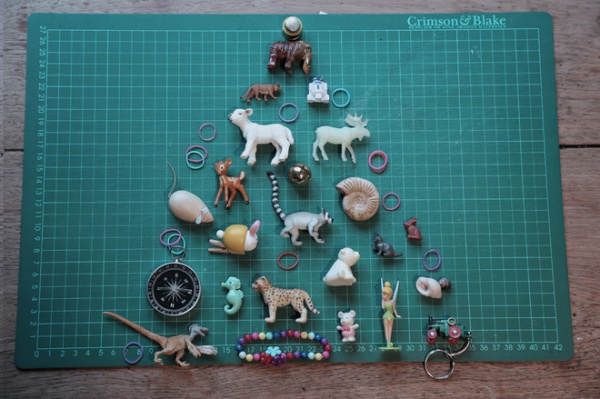
If your gifts are too large to fit, why not place a small sweet inside that can be traded in for a gift each day? Or you can enlarge the templates using a photocopier or Adobe Illustrator to vary the sizes of the houses.
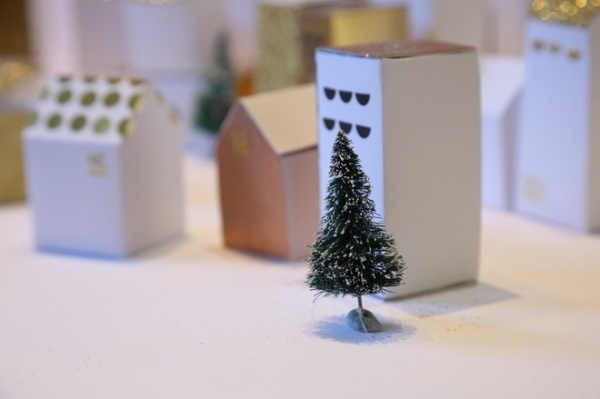
10. Once you have completed all 24 boxes, have fun arranging the Advent village in a festive scene. Mini fir trees dotted among the houses will add a seasonal charm. Finish off with a light sprinkling of glitter or fake snow.
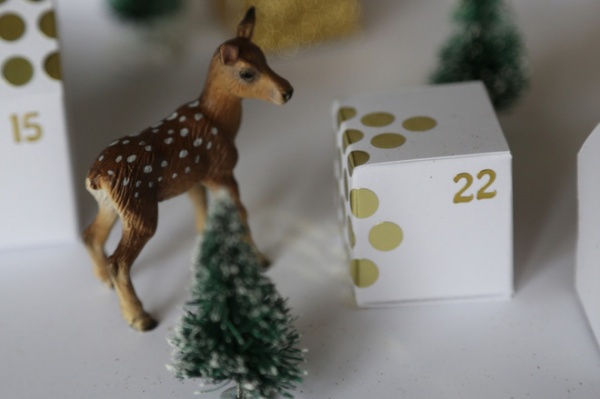
11. Open the first door on December 1 and let the countdown begin!
Metric conversions: The following templates produce houses that are about 1½ by 3 inches (40 by 80 millimeters) or 1½ inches (40 millimeters) square.
Related Articles Recommended


