Make a Natural and Wild Holiday Wreath
http://decor-ideas.org 11/25/2014 20:13 Decor Ideas
Made with bark-covered wire, this curly willow-tip wreath is the perfect combination of rustic and wild style for the holiday season. In just 10 simple steps, you can create one yourself using pinecones, dried lotus pods and Hypericum berries as seasonal embellishments.

This wreath makes for a great indoor decoration, above a mantel or even on the doorknob of a hutch. The Hypericum berries will last for a couple weeks, but once they are finished you can replace them with something else to keep the wreath going. Here are instructions from Tracy Goldman of Sabellico's Florist to make it.
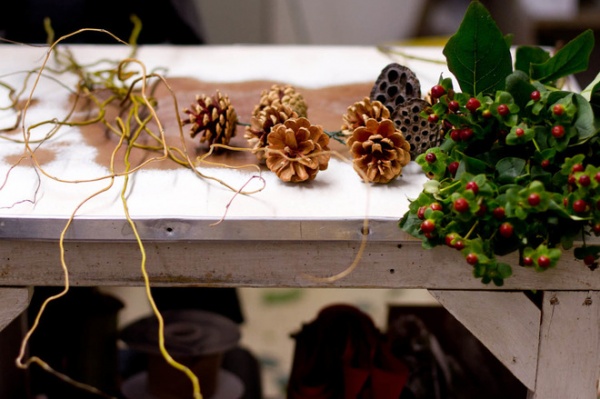
Materials and tools:
1 bunch (10 stems) of curly willow tips (fresh, not dried)6 pinecones2 dried lotus pods 2 or 3 stems of Hypericum berriesBark-covered wireThin floral wirePruning shearsScissorsRibbonGreen raffia

1. Trim off all the willow tips. Identify the small, flexible branches and cut them off the main stem. You will be using these to make the wreath, as they can bend and be shaped without breaking. You may discard the other pieces or save them for another use.

2. Cut off a piece of bark-covered wire that's big enough to wrap around the willow tips several times.

3. Gather a handful of the cut willow tips (five or six) and place them together evenly. Wrap them together tightly with the bark wire toward the bottom of the tips, wrapping around several stems for strength.
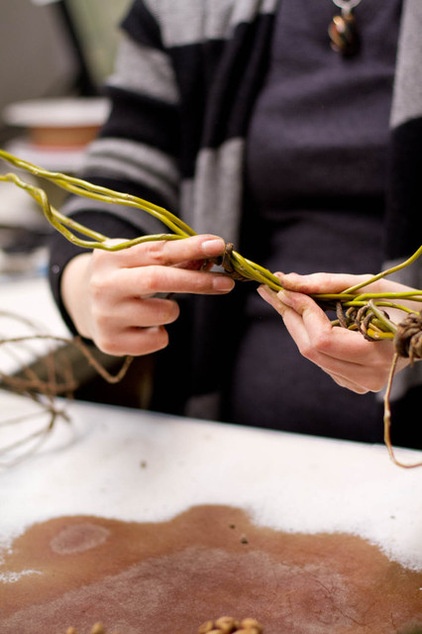
Grab a second handful of willow tips and repeat the same process so that you have two bunches of tied willow tips.

4. Combine the two bunches of willow tips that you just made into one large piece.

Place the bottoms of the willow tip bunches (where you tied them together) right next to each other, overlapping them slightly. Tie them together with another piece of bark wire to create one long piece that has the loose ends of the tips at each end.

5. Carefully bend both ends of the bunches toward each other to create a circular shape.

You can use regular thin floral wire to discreetly tie the pieces together.
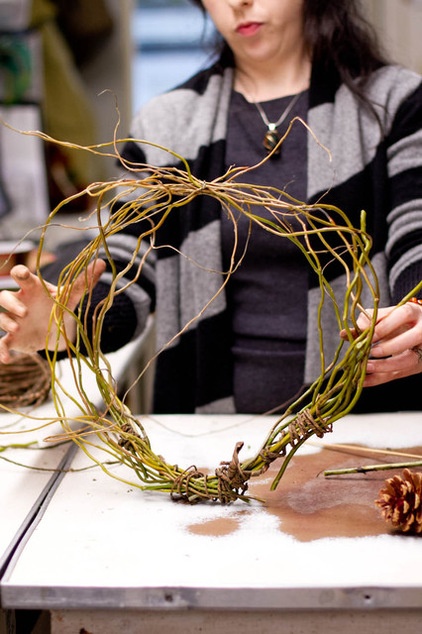
6. Play with the willow tips to create a circular shape. Don't be afraid to bend the arrangement; the tips are very flexible. Tuck pieces of willow tips in any gaps.

7. Trim off the ends of some pinecones to a desired length.
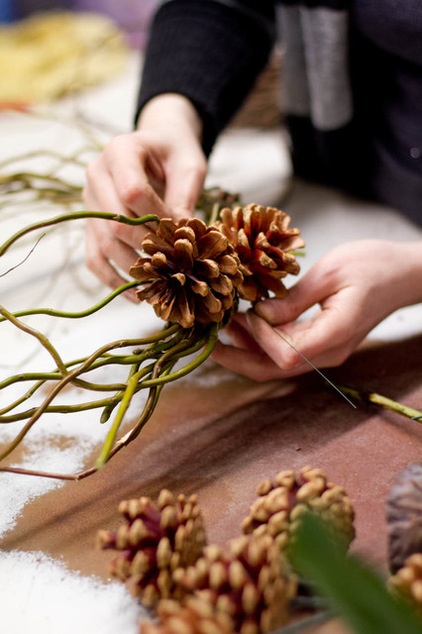
Thread a piece of thin floral wire through the gaps in the pinecones and bind it around the wreath. Using this method, you won't be able to see the wire, and it's much faster and less messy than a glue gun.

8. Add lotus pods and Hypericum berries as accents. You can gently slide the lotus pod stems right into the wreath without using any wire, if desired. Trim the berries into small pieces and wire them into the wreath for a nice burgundy accent.

Continue this process, playing around with what you think looks best.

9. Use green raffia to tie a small sprig of berries over the spot where you tied the wreath together with wire. This not only covers the area but counterbalances the other embellishments.

10. To create a hanger for the wreath, cut a piece of ribbon to the desired length.

Wrap it around the wreath and tie it into a knot on the wreath base..

Trim the ends of the ribbon to hang down over the wreath.

Cut another piece of ribbon and tie it around the wreath in the same spot. Tie a knot where the ends meet. Goldman looped this knot down to the bottom, where the first ribbon knot was; you can do the same or leave it on top.

More wreath DIYs:
Long-lasting eucalyptus wreath
Easy traditional holiday wreath
Related Articles Recommended
Related Images Recommend