Laundry Room Redo Adds Function, Looks and Storage
http://decor-ideas.org 11/06/2014 03:13 Decor Ideas
Chris Perkin thought his partner, Nathalie Kohler, was taking too long to decide how they were going to remodel their dark, dingy and storageless laundry room. So to kick things into gear, he demolished the laundry room one weekend while Kohler was away. “That put me up against the wall,” Kohler says, “but hey, it really needed to be done.”
Kohler still felt stuck, though. She’d tried to decorate in the past, but she wasn’t confident in her decisions. “I get the basic idea about organization, where things should be, but for style, I don’t have it,” she says. “I can’t pick colors or cabinets. It doesn’t work when I do it.”
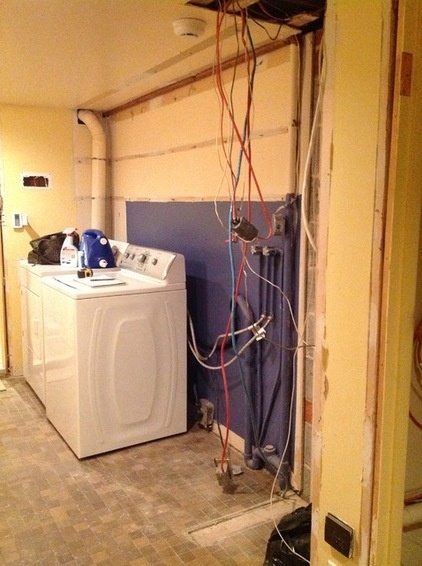
BEFORE: This is what the room looked like when Kohler came home one day to find that Perkin had done some demolishing. They didn’t know what to do next. There were too many doors — five — ugly brown tile and walls that were a “yellow, yucky color,” says Kohler. “There wasn’t even a place to put soap.”
The laundry room needed major storage upgrades, new appliances and a new look — to make it a place they would want to spend time in and that would impress friends walking through it to the guest bathroom. What’s more, Kohler wanted someone to push her outside her conservative-style comfort zone.
She searched Houzz for professionals in her area and found Joanne Padvaiskas of Wow Great Place. Kohler came across a photo of Padvaiskas’ own basement and loved that she had used skull wallpaper. “From that picture I knew Joanne had that je ne sais quoi to take us where we wanted to go,” Kohler says.
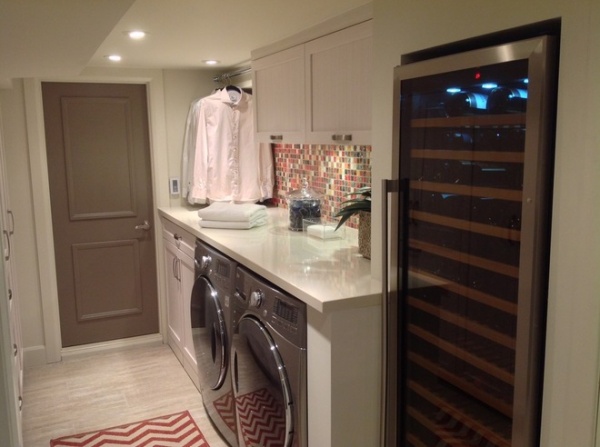
AFTER: New appliances, a large folding counter, smart storage and even a wine fridge transformed the space.
The couple already had the porcelain floor tile; it was left over from when they did the guest bathroom. Padvaiskas took the tile as a jumping-off point and designed the room around it. She laid the 12-inch by 24-inch porcelain tile in a brick pattern with barely visible grout lines.
As for the doors, Padvaiskas concealed one that opened to the hot-water heater behind a flush push-latch MDF panel to the right of the wine fridge. For the rest, like the one seen here that leads to the guest bathroom, she painted them dark gray and added moldings to make them more of a design element. Because the doors aren’t standard height, if she had bought new doors, she would have had to hire a carpenter to plane them down to fit.
Cabinets for soap above the washer and dryer have doors that open upward for better functionality. “Now it’s a place they actually want to do laundry in,” Padvaiskas says.
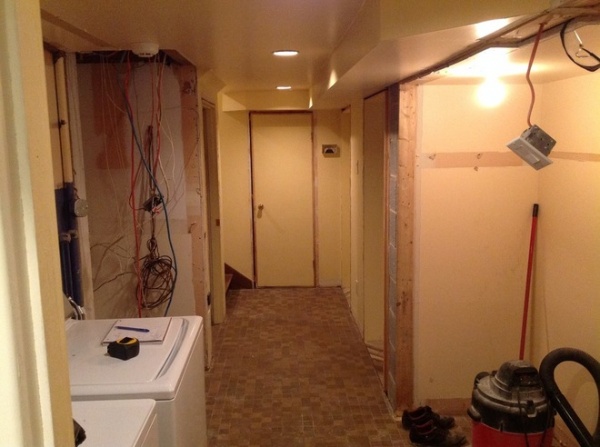
BEFORE: Three pot lights and a garage bulb didn’t provide enough light.
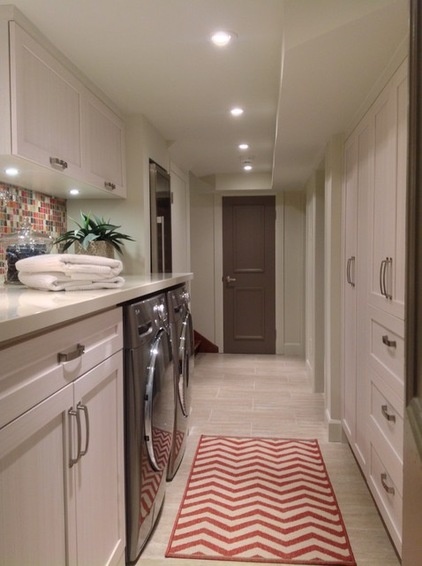
AFTER: Padvaiskas added more pot lights and undercabinet lighting to highlight the backsplash.
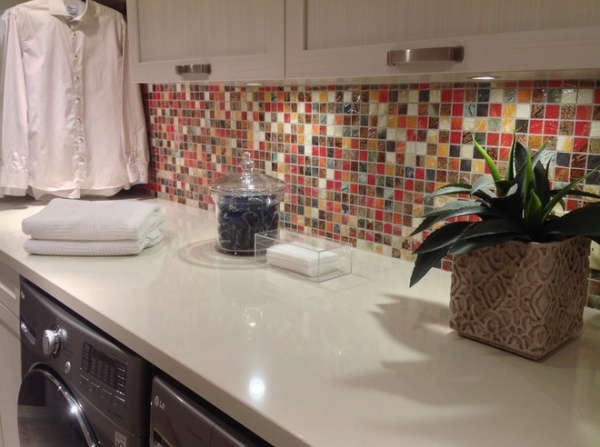
For the backsplash, Padvaiskas wanted to use some bright tile she had found recently. Perkin loved it, but Kohler at first said, “No way.”
“Then I thought through the years of my design and decorating decisions, and none of it was great,” Kohler says. “I didn’t want to do that again. So I trusted Joanne and hoped it would turn out good. She took me out of my comfort zone big-time, and now I love that backsplash so much.”
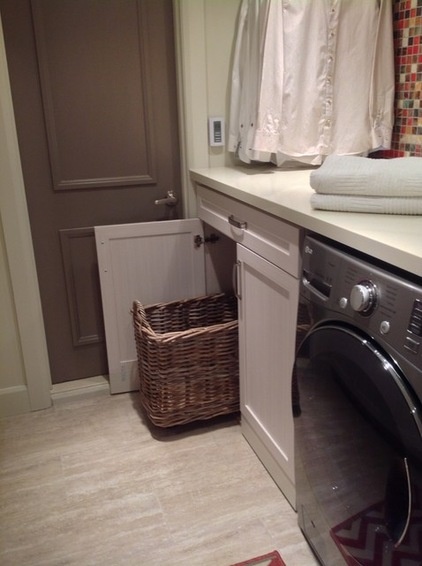
A hanging bar allows space for Perkin’s many work shirts, and a basket on wheels provides a hamper while still allowing access to the crawl space door at the back of the cabinet. (Padvaiskas created a false toe kick to accommodate the rolling basket.) The cabinets have a polyester finish that makes them extra durable. “We didn’t want anything too delicate in there,” Padvaiskas says.
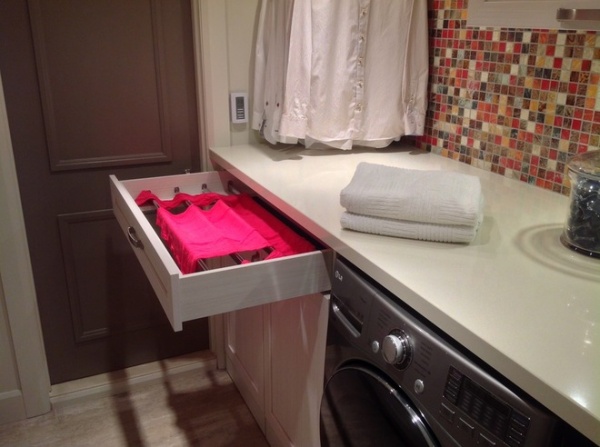
A bottomless pullout drying-rack drawer sits above the hamper.
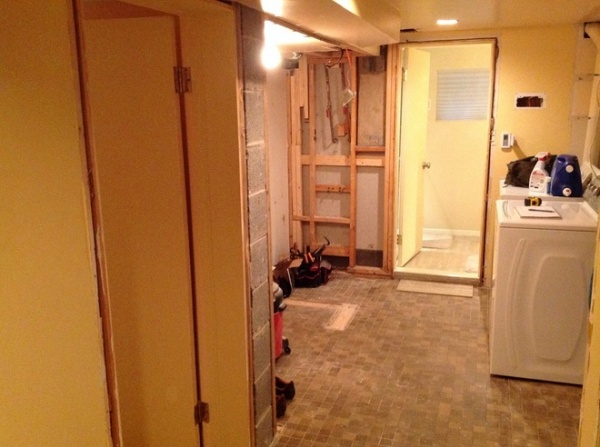
BEFORE: You can see the markings on the floor where a small closet behind a bifold door once stood. This was about all the storage the space had.
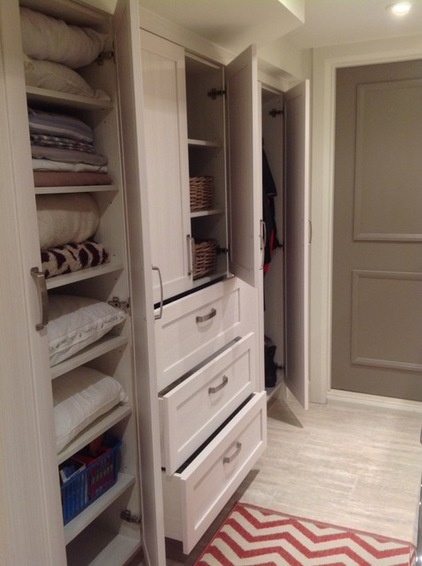
AFTER: A full wall of functional storage now occupies the space. On the far end is a tall cabinet for winter coats and boots. In the middle are deep drawers with baskets for lightbulbs and batteries. A linen closet is on the left. “There’s so much storage now, I can’t even fill it,” Kohler says.
The homeowners estimate that they spent about $24,500 for the renovation, including the washer, dryer and wine fridge. Padvaiskas says it’s a bit tricky to estimate because some labor costs were shared with an adjacent guest room remodel that took place at the same time. Here’s the rough breakdown of those numbers (before taxes):
Countertop: $2,000
Cabinetry: $7,000
Appliances: About $6,000
Backsplash and floor tile: $1,500
Labor (designer, contractor, tile installer, electrician, plumber): $8,000
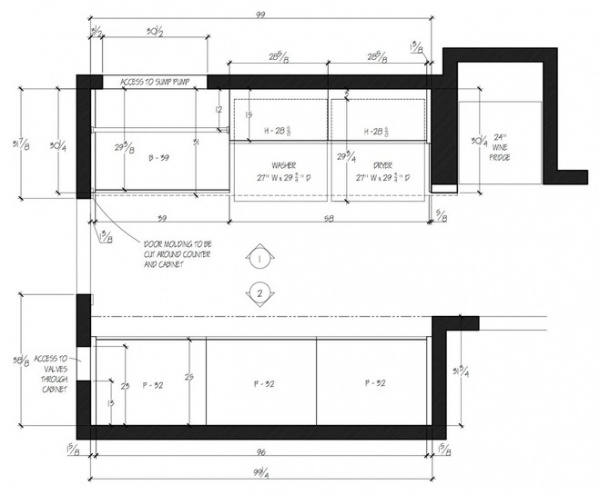
The floor plan.
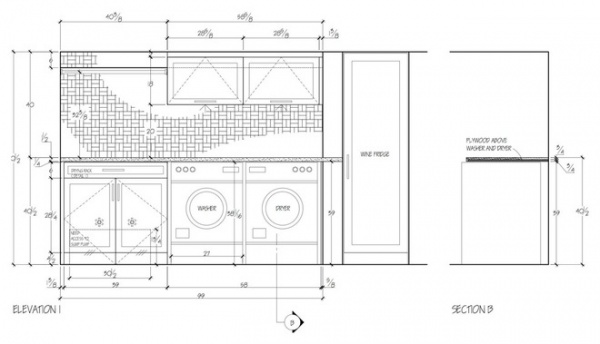
The appliances elevation.
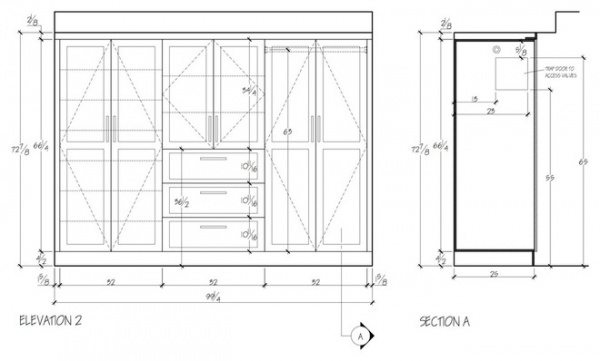
The storage elevation.
More:
10 Smart Ideas for Your Laundry Room Remodel
Browse wine fridges in the Shop Houzz section
Got a project you’re proud of? Upload your photos to our Before & After section. Your project could end up in a featured ideabook on Houzz!
Related Articles Recommended


