Geek Lab: How to Build a Steampunk Cat Transit System
http://decor-ideas.org 10/28/2014 21:13 Decor Ideas
Cats are always looking for something to do. That’s why we developed the Steampunk Cat Transit System (CTS) for a private residence in San Francisco. The homeowners spend a lot of time in their home office, which means their cat is always in there too, and they wanted to offer some entertainment. It allows the feline a means of traversing the room without ever stepping foot on the ground — or computer keyboard — and it looks cool because, well, we think steampunky things look cool. With the right tools and materials, you can make one for your kitty, too. Here’s how.
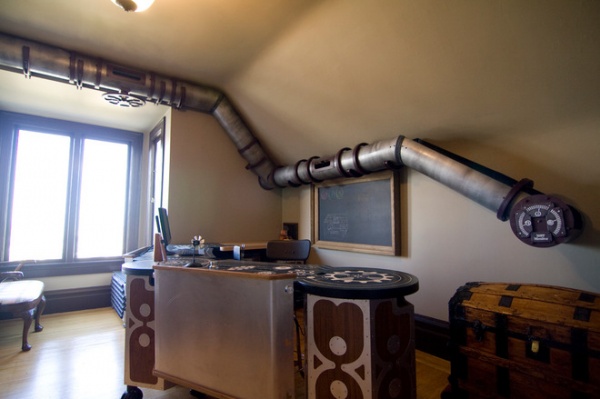
The first thing you’ll need to do is figure out where your cat transit is going to run. We made this run hug the walls so we could use an easy hook-style support system.
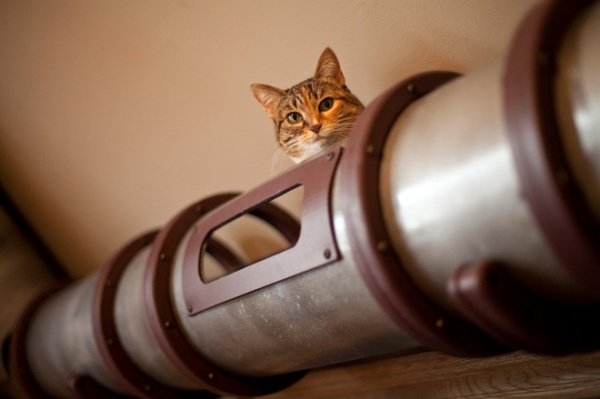
While you are considering the run placement, you should also think about what your cat likes to do. Most cats like to hide, peek out from hiding, jump on top of things and be up high. We designed this system according to those likes.
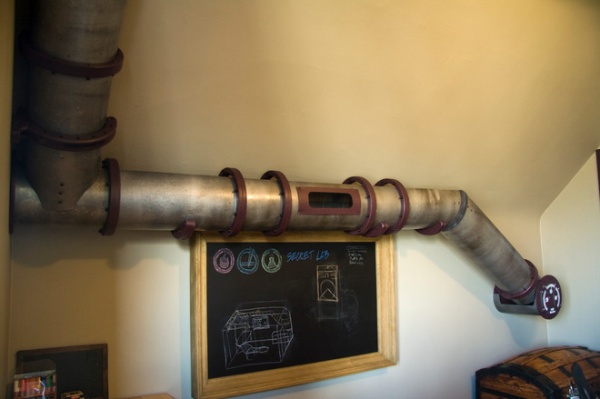
As you can see in this image, the entry point for the transit system is on top of a steamer trunk that was already in the room. This is easy for the cat to jump onto and then access the entrance to the system.
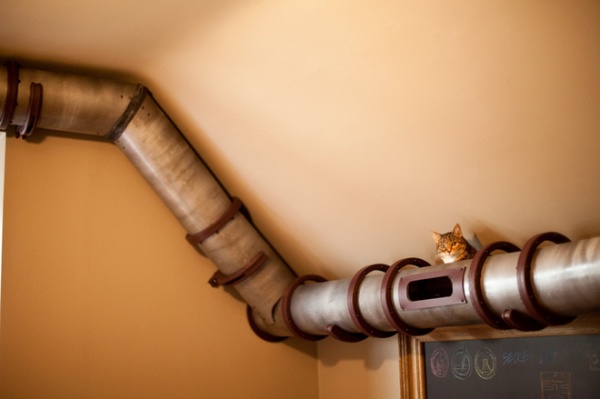
The run then loops around the room, giving many high vantage points for the cat to peer down from.
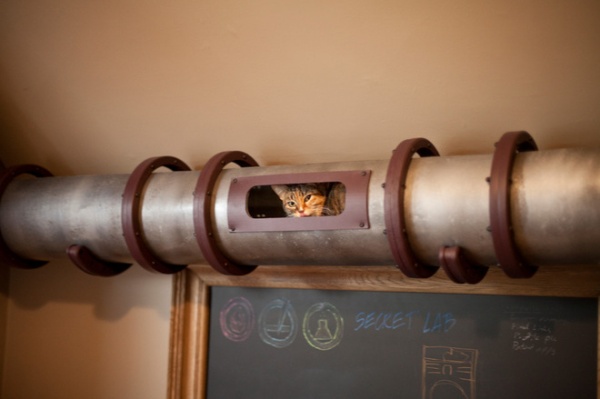
A cutout allows hiding and peeking.
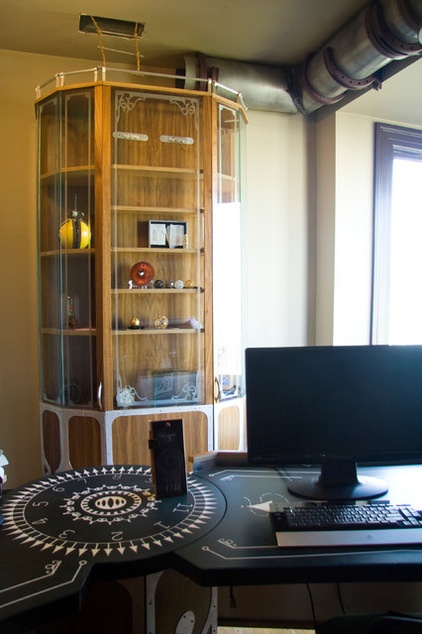
The run ends on top of a tall cabinet. Luckily we designed and made the cabinet too, so we were able to add a safety railing around the top of the cabinet to prevent the cat from sliding off if he or she were to fall asleep up there a bit too close to the edge.
The railing is made of aluminum rod, available in most hardware stores. It’s run between brackets cut out of ½-inch aluminum sheet.
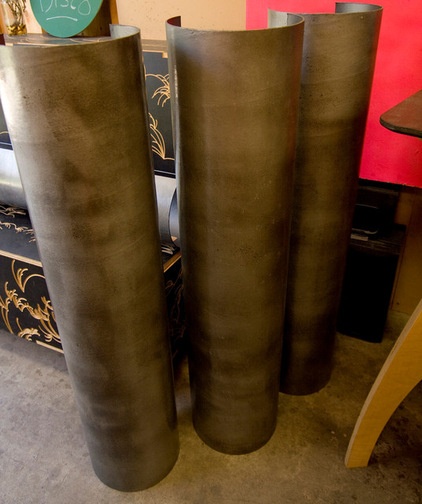
To create the system, we used Sonotube, which is a cardboard tube with a waxy interior finish used for casting concrete. Sonotube is cheap, readily available at most hardware stores and easily cut with a jigsaw. We cut about one quarter of the Sonotube off to allow the cat to see over the edge and to make it easier to clean inside.
Then we painted the outside of the tubes to make them look like old industrial metal. We used a combination of metallic silver for the base and oil-rubbed-bronze paint on top. You’ll want to use a primer on the tubes before you paint them.
We lined the insides of the tubes with industrial car carpeting, or speaker carpeting, because it is cheap and easy to cut, and it offers some traction for a cat walking along the interiors. We used Gorilla Glue to glue it in place.
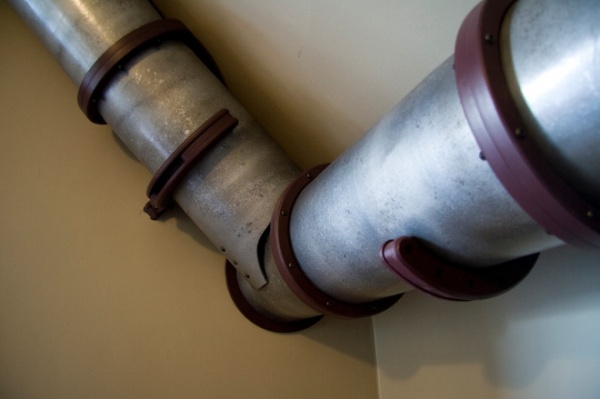
After you cut the cardboard tube, you will notice that its structural integrity has been reduced. To beef up the tube again, we needed to add some supporting rings, in addition to hooks to attach it to the wall. We made all the attachment hooks and supporting loops out of plywood, cutting them with our computer-aided tools (or CNC machines). You can find CNC-machine shops in your area or make a template and cut the pieces with a jigsaw. CNC shops use digital files.
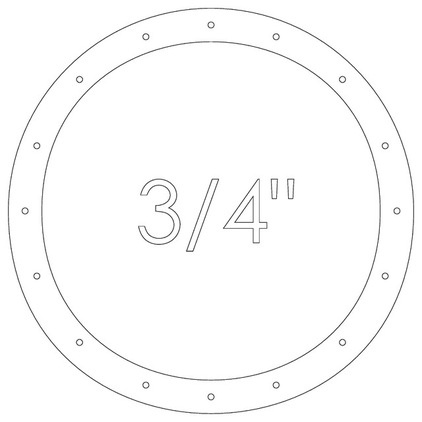
Click the download button to save this PDF template of the support rings we designed and made for this particular project. You can then send it to a CNC shop near you to be cut from
¾-inch plywood.
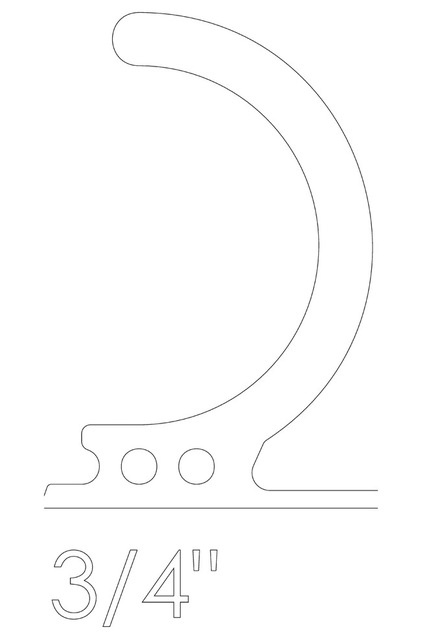
Here’s the PDF of the attachment hooks, which were also cut from ¾-inch plywood.
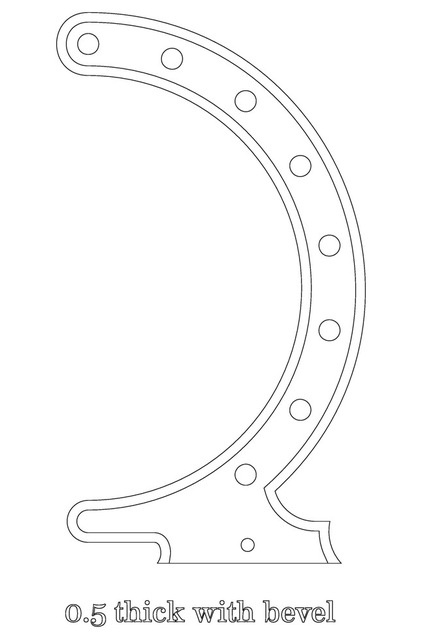
To add a decorative touch, we created these bevel lines from ½ -inch MDF. Two of these pieces sandwich the attachment hooks for a more steampunk look.
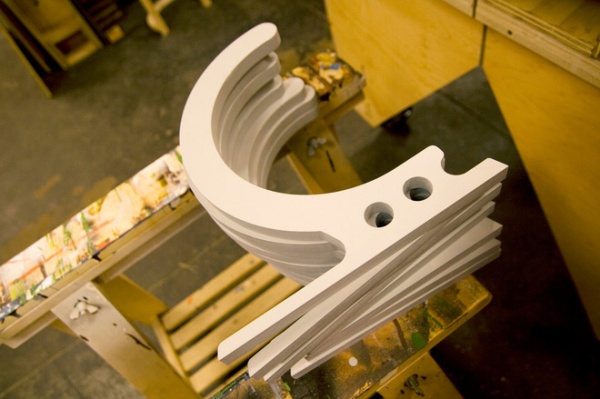
After cutting out the support rings, attachment hooks (shown here) and decorative pieces, we primed and painted them to make them look more industrial. If you cannot spray the paint in a spray booth, use a foam roller for a clean, consistent finish.
Attaching the wooden circles and hooks with button-head cap screws and acorn nuts also added to the industrial look.
When screwing something like this to the wall, you want to be sure to anchor it properly or go into the studs. If you cannot find a stud in the right place, try using a toggle anchor for the most versatility and strength. When in doubt, ask someone handier to help you.
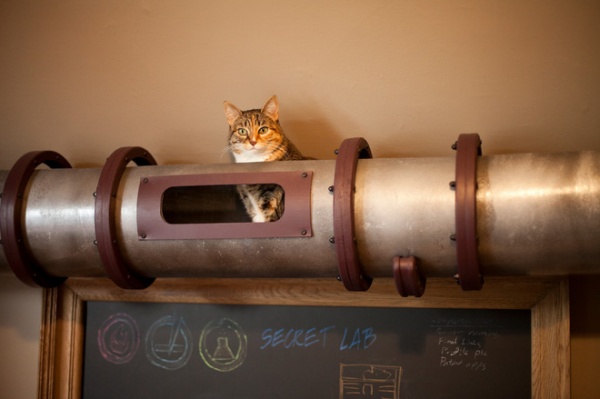
In the end you will have a very industrial-looking system and a very happy cat!
Materials:
12-inch-diameter, 4-foot-long Sonotube (about $12 each)
Speaker carpet (about $20 per roll)
Button-head cap screws (about $2.50 each)
Gorilla Glue (about $6)
Acorn nuts (about $1.20 each)
Sheet of plywood (about $45)
Primer (around $15)
Metallic paint (about $15 per quart)
Metallic spray paint ($7 per can)
More
Incredible Home Catwalks Make for Purr-fectly Happy Felines
Pet-Friendly Design: Making Room for the Dog Dish
Related Articles Recommended


