How to Reseal Your Asphalt Driveway
http://decor-ideas.org 08/05/2014 00:14 Decor Ideas
Your poor driveway. Between taking the weight of your car several times a day and enduring the elements 24/7, it really takes a beating. And yet, aside from the odd crack or pothole, it really doesn’t complain. The only thing it requires is that you reseal it every two years. Here’s how.

Who to hire: This is a project you can likely take on yourself. But if you do decide to go with a pro, make sure you choose someone who’s licensed and insured, and for whom there are no complaints registered with the Better Business Bureau. The professional you choose should also give you a written estimate and should never ask for cash up front.
Steer clear of anyone who knocks on your door offering to do your driveway for a rock-bottom price because they have some extra SealCoat. It might be a scam.
Best time to reseal your driveway: Spring through fall is the best time in most parts of the U.S. You’ll need to pick a time when it’s warm enough for the sealer to set — typically a period where temperatures won’t dip below 60 degrees for 24 hours before and after the sealer is applied — and when no rain is in the forecast for that same period.

Cost: Pros charge between 10 and 25 cents per square foot on average. In areas with snowy winters and hot summers, where driveways are more prone to problems, prices are often lower due to increased competition.
Given the average price per square foot, it should cost about $170 for a pro to take care of a 1,000-square-foot driveway, as opposed to about $140 in supplies if you do it yourself.
So while this might be a project you can handle, the potentially marginal savings means you need to look at the size of your driveway and figure out what your time is worth. That’s what will really determine whether you should hire a pro.
Typical project length: Two or three days, including drying time.
Project considerations: Be sure to pull your cars out of the garage and park them elsewhere; otherwise you’ll be stuck at home while the sealer dries.

Equipment needed to DIY:
Asphalt sealer
A broom or squeegee
Rubber gloves
Blacktop patch and/or crack compound
A putty knife or trowel
First steps: Check your driveway for gas or oil stains. If you find any, clean them with a mild detergent; otherwise they’ll bleed through the sealer.
Pull out any grass that’s taken root in the cracks, and make sure the grass bordering your driveway is trimmed back so you don’t end up accidentally gluing it to your driveway with sealer.
Fill any cracks, following the instructions on your patch sealer or crack compound. If you’re using patch filler on a pothole, apply it before using the crack compound and drive your car over it a few times to compress it. That way you can be sure you’ve used enough to completely fill the hole.
Once you’ve finished, sweep your driveway clean of dirt and hose it down with water. Let it dry for 24 hours.
Tip: Choose a crack sealer carefully. Some aren’t meant to have sealers immediately applied on top. Read the label carefully before purchasing.
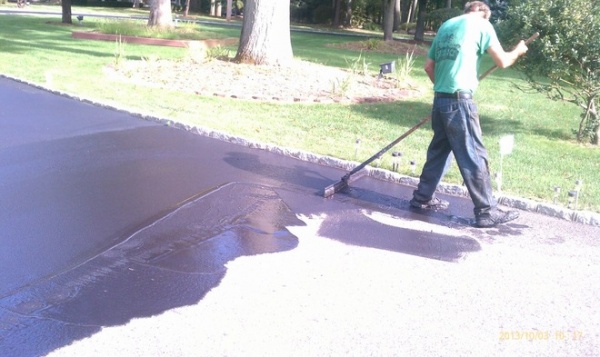
Open the container of sealer and stir it well. Starting at the highest part of the driveway and working down, use your broom or squeegee to apply a thin coat according to the manufacturer’s instructions. Do one small area at a time — a 4- by 4-foot patch should do it. Working in small patches ensures an even coat overall. Just be sure to feather the edges to avoid a patchwork appearance.

Allow the first coat to dry for six to 12 hours, then check to see if any areas require a second coat, which you can apply at that time. Again, feather the edges to make sure the patches are blended.
Once you’ve finished, clean your tools (and yourself) with soap and warm water, which should take the sealer right off.
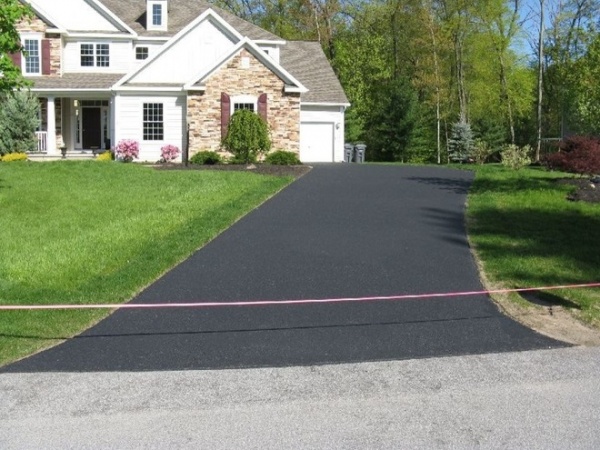
Avoid walking or driving on your driveway for the next 24 hours while the sealer dries. It’s probably a good idea to block off the entrance with sawhorses, garbage cans or brightly colored tape so nobody accidentally uses it.
The only thing left to do is sit back and relax while your now-pristine driveway dries.
More: How to Give Your Driveway and Front Walk More Curb Appeal
Related Articles Recommended


