How to Turn a Vase Into a Lamp
I have a thing about lamps. It’s my grandmother’s fault. She was an art professor at the University of California, Santa Barbara, in the 1950s and ’60s. She had wonderful taste and an eye for beauty. Any object she lived with was, to her, potentially a work of art — and this applied particularly to lamps.
In the ’60s lamps tended to be enormous, so stepping into her living room was like entering the most fascinating forest of lamps. The result is that I have never been satisfied with just any lamp. In the process of finding lamps that satisfy, I have discovered that many things can become lamps that might otherwise be overlooked. A Spanish santo, a pair of French altar candlesticks and an antique Chinese vase are all lamp candidates in my mind.
Although some of these objects will require a professional to bring the transformation to fruition, turning a vase into a lamp is something that most of us can do ourselves. I’ve done it many times, and with very satisfying results, so I’m going to share the process with you here. It’s a fun project to take something beautiful that you love — but that may be tucked away in a closet — and make it into something that you can use every day.
For safety’s sake, be sure to follow all manufacturers’ instructions and abide by electrical codes in your municipality.
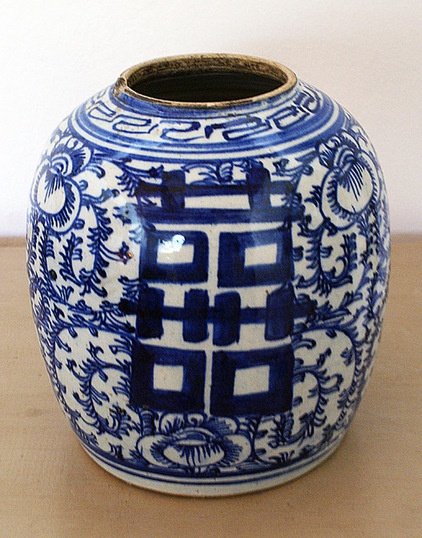
I’ve had this antique Chinese vase, or ginger jar, for many years. It often held flowers, but even more often was hiding in a cupboard amongst other vases, where I’d often forget about it. But recently my wife and I decided we needed a lamp of a particular size for a side table in our living room. Suddenly, I had an epiphany: Our little Chinese blue and white vase would be perfect!
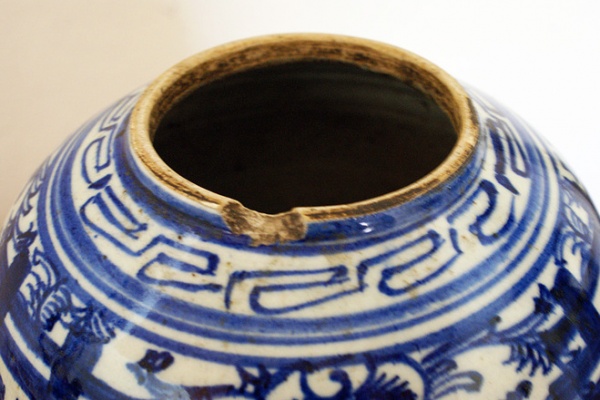
It’s an antique, but it’s not precious. It already had this chip on the edge when we bought it, which never bothered me, since I’m not fussy about those kinds of things. And it meant that I wouldn’t have any problem drilling a hole in the bottom, because it’s not valuable enough to worry about.
So that’s step one. If I’m making a lamp out of some kind of container, it needs a hole in the bottom, so off to the lamp store I go. Since the people there make lamps all the time, they are happy to drill mine, and they know what they’re doing. They always tell me there’s a chance it will break and they won’t take responsibility if it does, but I’ve never had that happen.
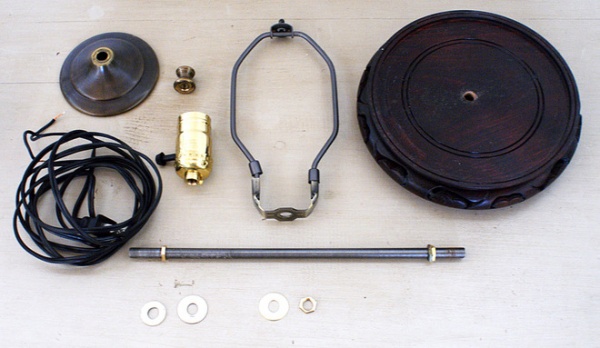
Most lamp stores, some hardware stores, and places like Lowe’s and The Home Depot will usually have the rest of the items you’ll need to complete your lamp. Your list will include a cap, a neck, a socket, a harp, a base, a length of threaded pipe, three washers, four nuts that fit the threaded pipe and an electrical cord with a plug at one end. (My cord is about 9 feet long.)
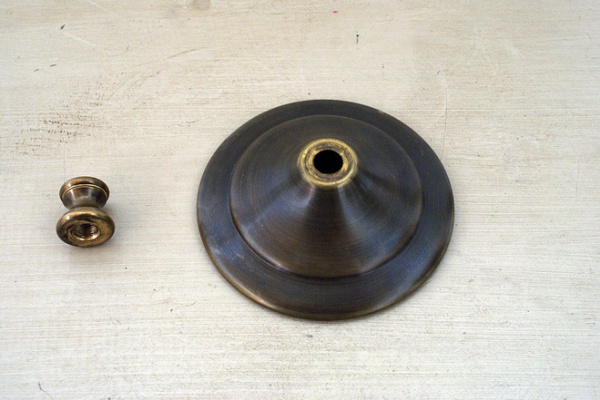
Pictured here is a 4-inch-diameter cap that just fits over the top lip of the vase. To its left is the neck. The neck gives a finished look to the transition area between the cap and the light socket.
These pieces are usually available in bright brass and antiqued brass, as well as black or white. I liked antiqued brass for my vase.
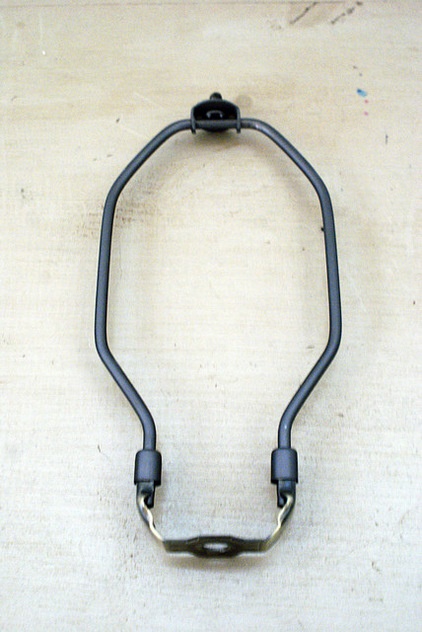
The size of the harp will depend upon the size of the shade you pick. As a rule of thumb, the bottom of the shade should just cover the top of the neck when viewed at eye level. So buy a harp that puts the shade at that height. The harp fits onto the threaded pipe that goes up through the middle of the lamp. It fits on just after the neck and before the socket.
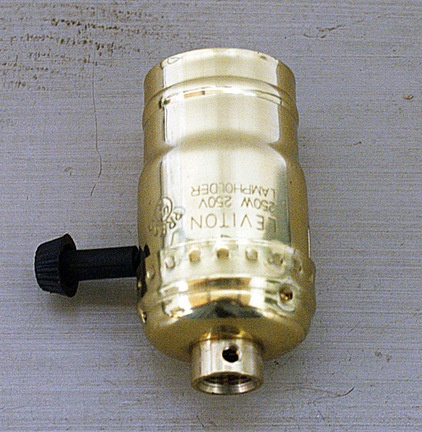
This is the socket. They are almost always brass, and the heaver gauge metal you can find, the better — it just gives the lamp a more substantial feel. I also like to use a three-way socket, because most lamps need different levels of brightness for different occasions.
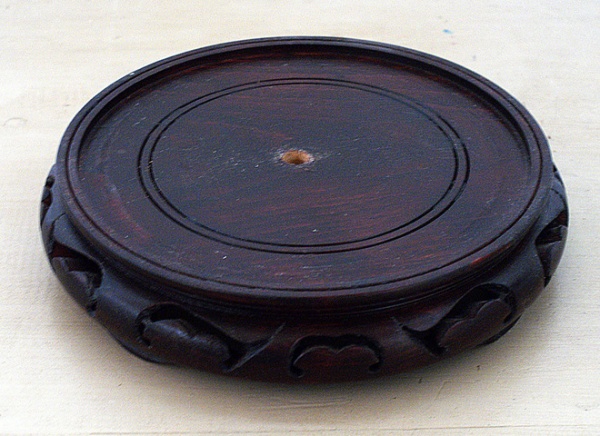
My lamp base is 7 inches in diameter, because that’s what fits my vase. Bases come in many sizes, shapes and styles. This carved Chinese one seemed right for my little project. You want to get as close as you can to the right size — but if it’s a smidge too big, that’s OK. Many will already be drilled to accommodate the threaded pipe, but mine wasn’t, so I did it myself.
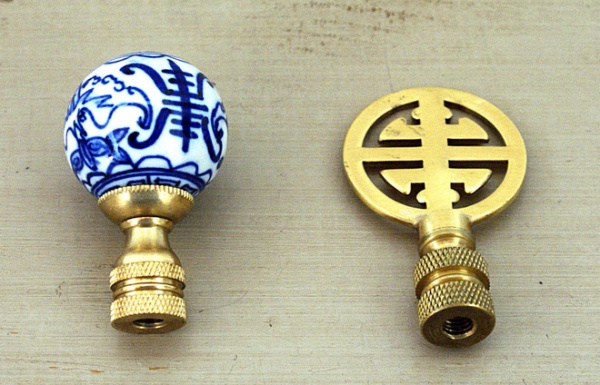
The finial is what tightens the shade to the harp. You can use just a simple brass knob, but I always like to find something interesting. Either of these two would work great with my lamp.
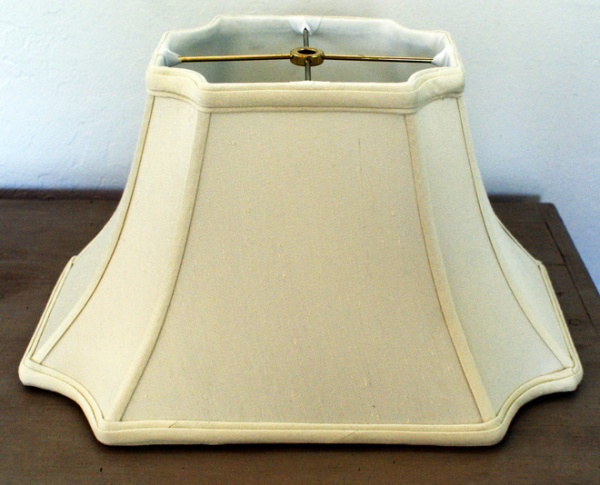
Lampshades are practically limitless in size, style and material, so here are a few guidelines. I prefer silk or another fabric to paper, because fabric diffuses the light in a soft and lovely way. To me it also just looks classier. But this is very subjective, so get a style and material that look good to you.
In terms of proportion, the shade should be just a bit shorter than the vase, and usually 10 to 20 percent larger in diameter. But again, this is ultimately a matter of taste. My wife likes them a bit smaller than I do.
How to Choose a Lampshade
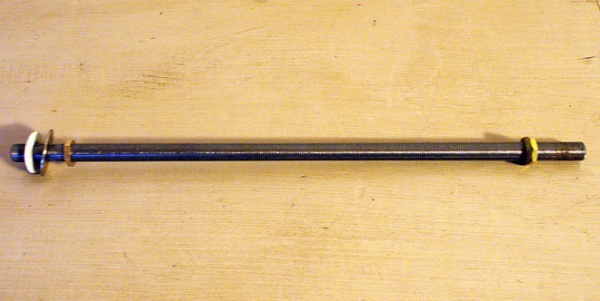
So now that we have all our things gathered, let’s get started. My lamp measures 11 inches from the top of the neck to the bottom of the vase. Add 1 inch and cut the threaded rod to that length with a hacksaw. That will leave just enough to protrude through the base and the neck to attach washers and nuts on the bottom, and the socket cap on top.
The threaded rod is a standard size for most lamps: approximately ⅜ inch in diameter. On one end of the rod, place one nut, one metal washer and one rubber washer, about 1¼ inches from the end. On the other end, place a nut about the same distance from the end. These can be adjusted as necessary.
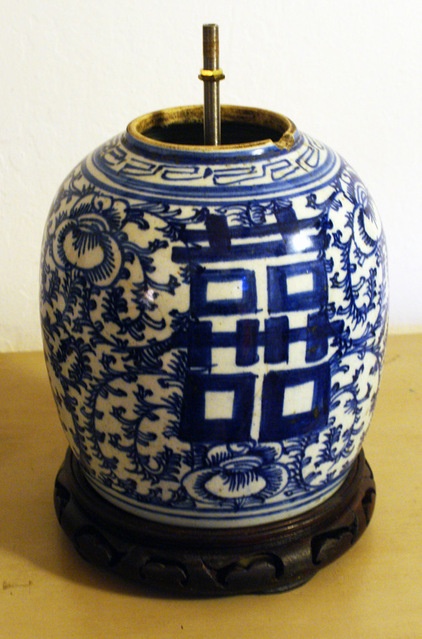
Place the end of the threaded rod with the rubber washer through the hole in the vase and the base, and secure it with another metal washer and nut from underneath the base. Now the base is securely fastened to the vase. Progress!
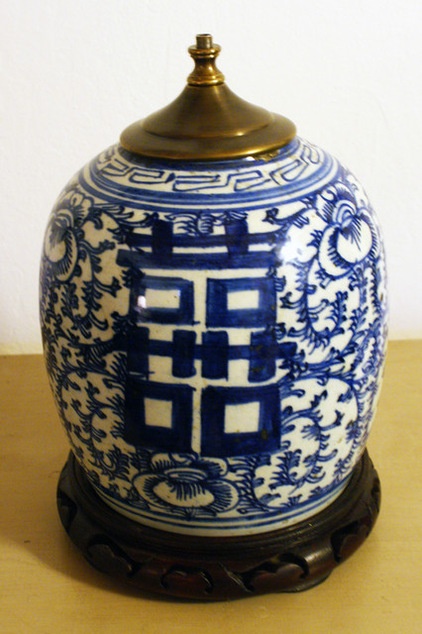
Place the cap over the threaded rod (adjusting the nut underneath, if necessary) and screw down the neck. This will secure the cap to the vase. Make sure to tighten things very carefully — you don’t want to crack the vase.
Notice that you’ve got about ⅜ inch of threaded rod protruding through the neck. Perfect! This is just what you need to secure the socket cap. We’ll get to that in a minute.
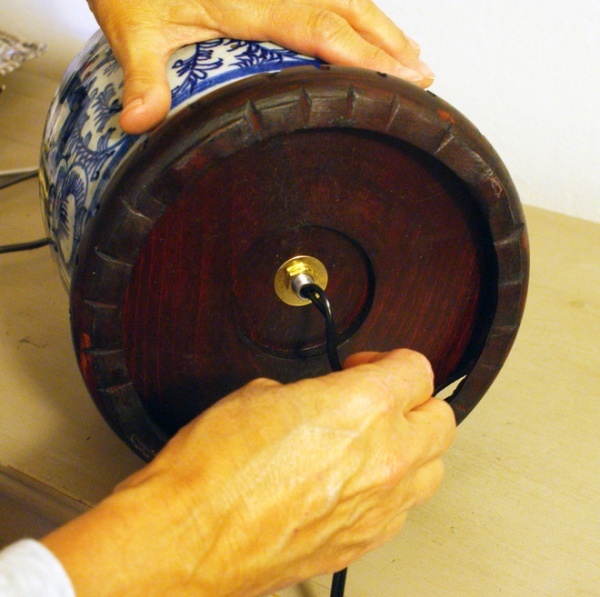
Thread the electrical cord through the rod from under the base, up through the neck.
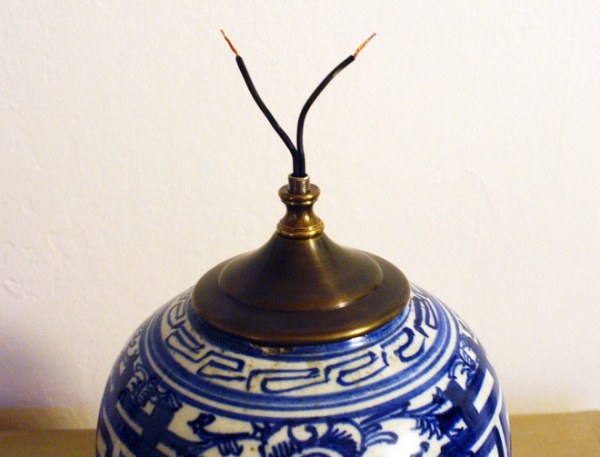
Notice that I’ve carefully split the two wires in the cord about 2 inches down, removed about ½ inch of the insulation from each end and twisted the copper wire tightly so it stays together and doesn’t fray.
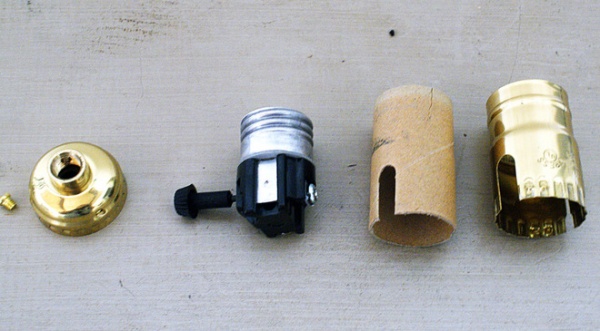
These are the parts of your socket. They include, from left to right, the socket cap, the socket itself, the cardboard sleeve and the brass socket sleeve.
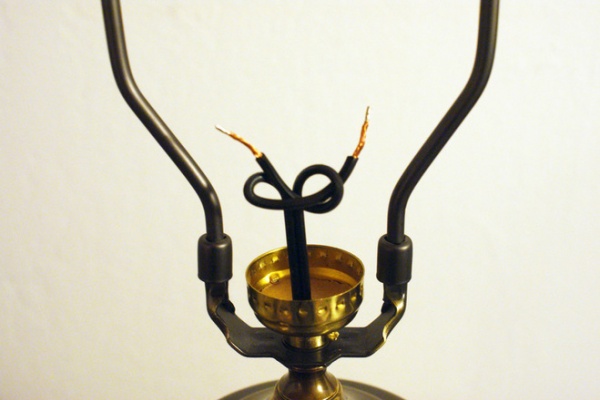
Thread the harp over the wire onto the threaded rod, and then thread the socket cap over the wire and screw it tightly onto the threaded rod. This will secure the harp and provide a solid base for the socket. I’ve also tied a little knot — called an underwriter’s knot — in the wires, to help keep tension off the wires where they’re connected to the socket.
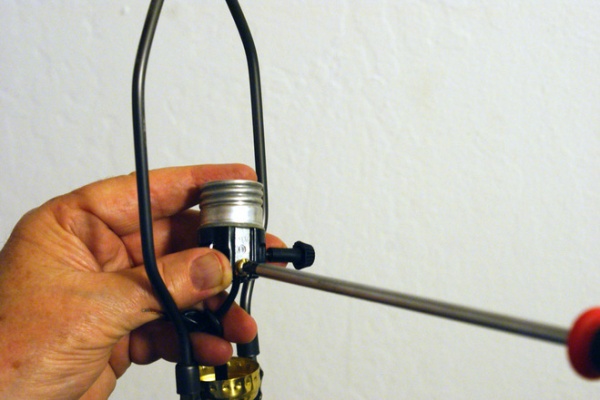
Now you’re going to connect the wires to the socket. Note that there are two screws on the side of the socket. Bend each copper wire into a fish hook shape, hook one over each screw and tighten the screws securely.
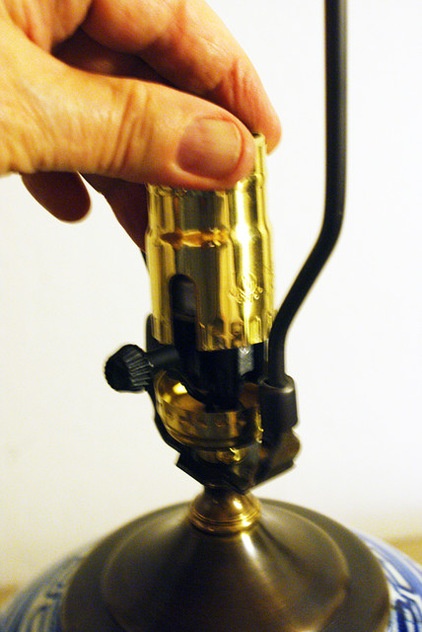
Pull the cord firmly from underneath the base so the socket sits snugly in the socket cap, and then place first the cardboard and then the brass socket shell over the socket and snap it into place in the cap. (This can take a little jiggling.)
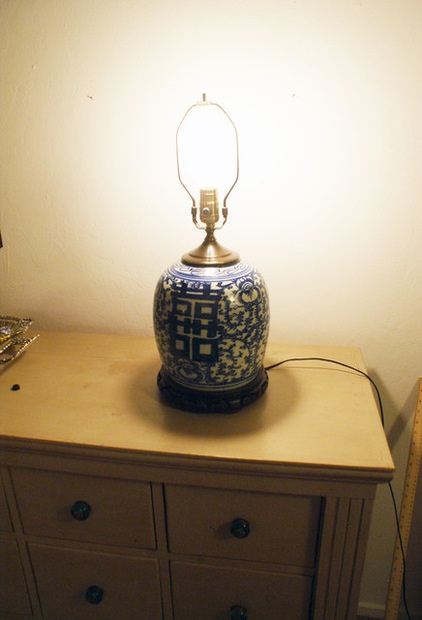
If you did everything right, when you screw in a bulb, plug in the cord and turn on the switch, you’ll have light!
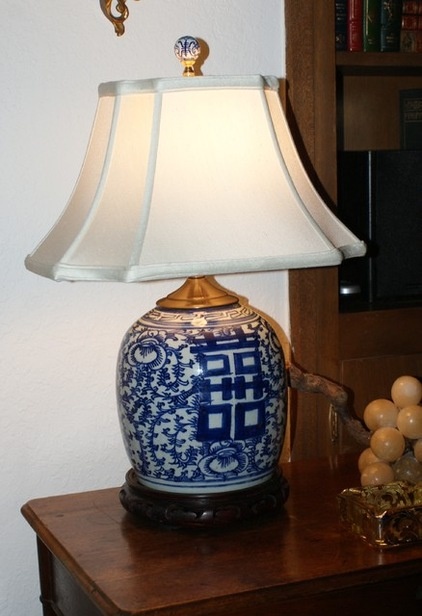
I know, it may seem like a lot of work. But to me a lamp made with something special like this old, loved vase is really much more special than something I’d pick up in a store. And I think my grandma would be proud.
More: Amp Up Your Room With Colorful Lampshades


