How to Build a Raised Bed for Your Veggies and Plants
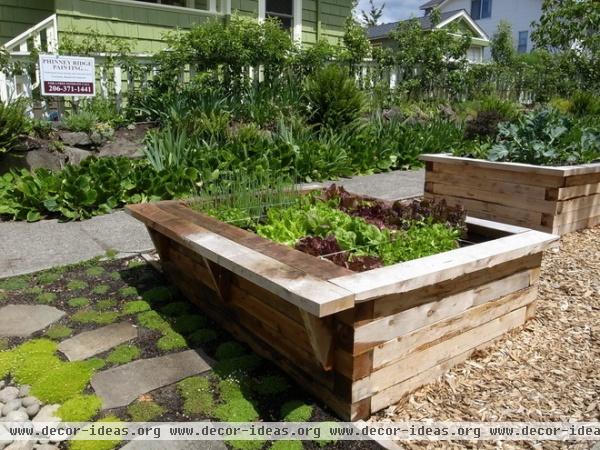
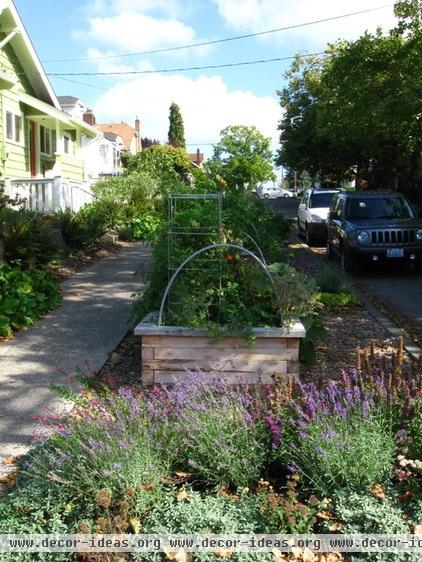
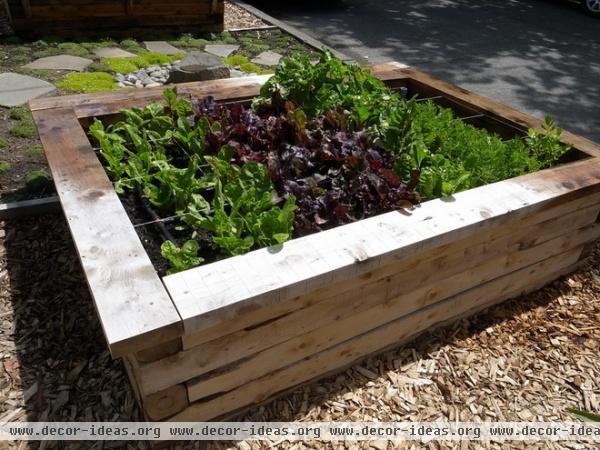
For much of the year, Tom Richardson harvests everything from tomatoes to kale to carrots from six juniper beds in his parking strip farm in Seattle. Though the boxes, built by designer Sam Kraft, are relatively simple, their rough-cut elegance and thoughtful details elevate them as a design feature — from the choice of wood to the cantilevered bench included for garden visitors.
“Any tree species that is young — meaning small diameter — and rough sawn will give this look,” says Kraft, “but very few will be appropriate for this application.” Juniper is naturally rot resistant and is an invasive species in the Oregon forests, where it is typically harvested from, making it a great option for the Pacific Northwest. “Placing demand on this wood helps the economic argument of sustainable forestry practices,” Kraft says.

It’s important to think about planning, layout and materials before you even begin. (Kraft notes that this type of thinking is arguably the most important and least discussed skill of a good carpenter.)
One person could build these boxes, but it’s ideal to have a friend help with positioning and leveling. Making the boxes is easy, Kraft says; getting the boxes aligned and level is a little more challenging.
You can make the box as wide as you like, but most people suggest building no wider than 4 feet so that you can easily reach the middle of the bed. The length is up to you; Kraft based the dimensions for these boxes on the fact that the wood pieces come in 8-foot lengths.
For an 8-foot by 4-foot box that is five courses tall with a cap and a bench (excluding an irrigation system), you’ll need:
Materials:
15 juniper 4-by-4s4½ juniper 2-by-6s50 timberLOK screws40 3½-inch deck screws6 carriage bolts, nuts and washers (to go through the bench support and 4-by-4)Tools and saftey gear:
Chop sawMalletDrill and impact driver (with a bit for the timberLOK screws)Framing squareJigsaw or circular saw (to cut bench supports)6-foot levelStringShovelHardback rakeEye and ear protectionWork gloves

1. Use string to create a straight line along the ground if you are building more than one raised bed in a row.
2. With the shovel, level the ground where the box will go. You don’t need to level the entire footprint; you just need to make sure the ground is flat where the wood for the frame will sit.
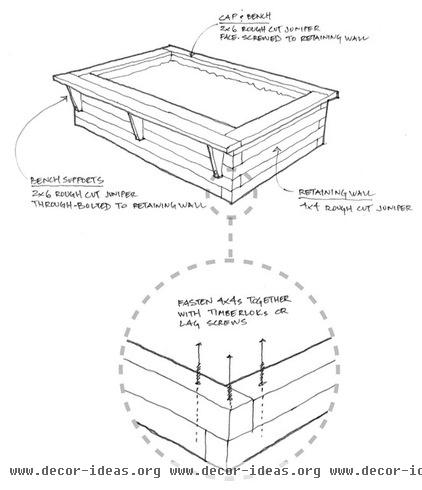
3. Use the framing square as a guide to keep the bed square. Assemble a corner of the bed that is two courses (two pieces of wood) tall. Predrill and screw in the timberLOK screws to fasten the two courses together (see diagram). Continue in the same way with the other three corners.
4. Check that the rectangle is square. Continue to build up the courses, checking that they are level and square as you go. All the courses are fastened in the same way, with two or three timberLOK screws at each corner screwed down into the course below it.
Build the beds as tall as you like, but it’s important to keep in mind that cost and time will increase as the height does.
If you’re building on a parking strip or easement, like these juniper beds were built, local codes may dictate how tall they can be. In Seattle, for example, raised beds on the parking strip cannot be taller than 18 inches, but should be taller than 6 inches.
5. Fasten the 2-by-6 cap to the 4-by-4s every 24 inches or so with deck screws. This box has a 2-inch overhang, and the cap is mounted flush with the inside of the box. How much the cap hangs over is up to you, but make sure it’s consistent around the box.
6. For the bench, bolt at least three supports into the 4-by-4s of the raised bed (see diagram). The bench portion of the box consists of two 2-by-6s. The inner piece of wood sits on the 4-by-4 portion of the raised bed, completed in the previous step, and the outer 2-by-6 sits on the supports that have been bolted into the 4-by-4.
There is no need to finish the wood; in fact, it’s not suggested to use treated wood for edible gardening.

Adding PVC hoops. Landscape designer Erin Lau added removable PVC hoops in the raised beds for tomato hothouses or cold frames. This is easy enough to do this after the beds are built.
You’ll need two sizes of PVC pipes (one that will fit like a sleeve over the other); Kraft suggests ¾-inch and 1-inch pipes. You’ll attach them to the boxes with galvanized conduit clips.
Cut the larger PVC pipes into 6-inch lengths using the chop saw. Fasten them inside the walls of the 4-by-4s using the galvanized conduit clips. Make sure each pipe has a mate across from it. The tops of these PVC pieces should reach just above where the top of the soil in the bed will be.
After the larger PVC pipes are in place, test the smaller pieces at the height you want the hoops to be and cut all pieces accordingly.

More: See more of this parking strip filled with edibles


