Get a Wallpaper Look With a Hand-Painted Touch
http://decor-ideas.org 03/06/2014 07:24 Decor Ideas
I love to draw inspiration from anywhere I can. A while back I came across the Ashbury Mosaic tile by Walker Zanger. I loved the pattern but had no bathroom or kitchen remodel scheduled. So I decided to create a similar Moroccan pattern in paint and use it in my entryway. I have used traditional stencil patterns before. This time around I wanted to create something unique and original, so I simply drew the pattern on the wall and filled in the lines with paint. The space feels that much more personal since I painted it all by hand.

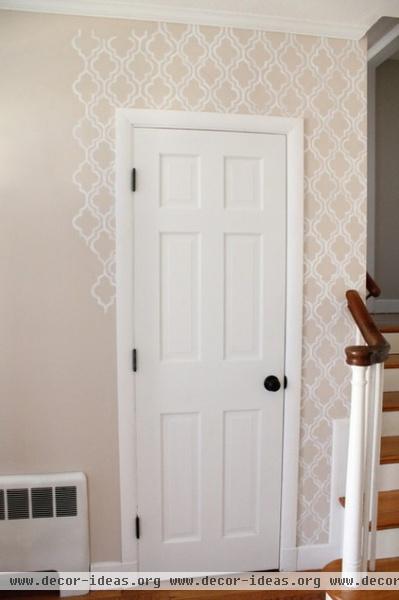
When we bought the house, the front entryway was a dull shade of beige. I replaced the light fixture and the closet door to update the look and repainted the walls with Benjamin Moore’s Muslin.
I did a little bit of tracing each day so I wouldn’t drive myself nuts. It was a very repetitive process but very much worth it! The project ended up taking me five days from start to finish.
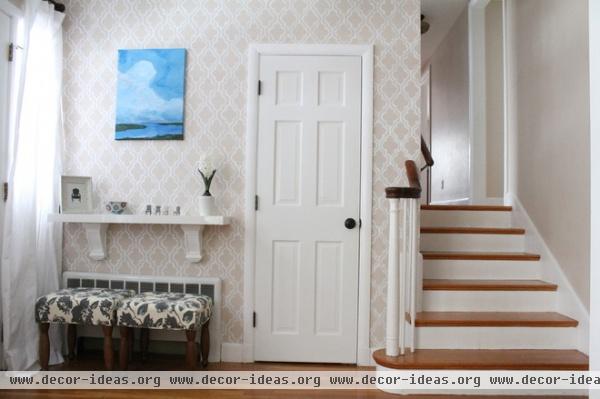
AFTER: The result is a refreshing take on wallpaper that cost me only the price of a quart of paint and a paintbrush.
There are hundreds of tutorials out there suggesting ways to go about a project like this. I read through a lot of advice until I came up with what worked best for me. Some suggest taping a small level onto your stencil to line everything up, but I felt I could skip that step. Others suggested a cardboard stencil, but I preferred paper. Keep in mind that any large-scale project like this requires at least a couple of days.
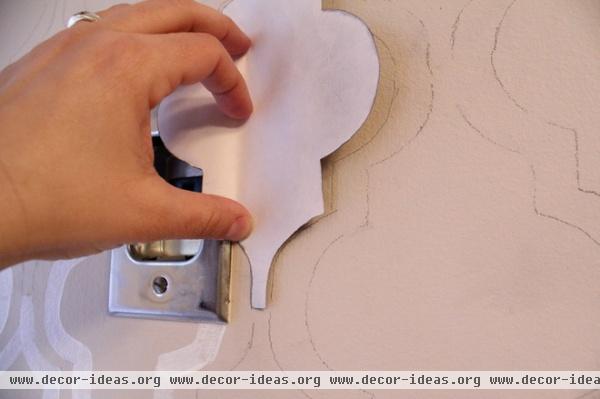
I started by drawing the pattern onto a piece of paper and cutting it out. Many tutorials recommend cutting the pattern out of cardboard. I preferred paper, since I felt the edge was crisp and since I could also easily bend it around corners and outlets.

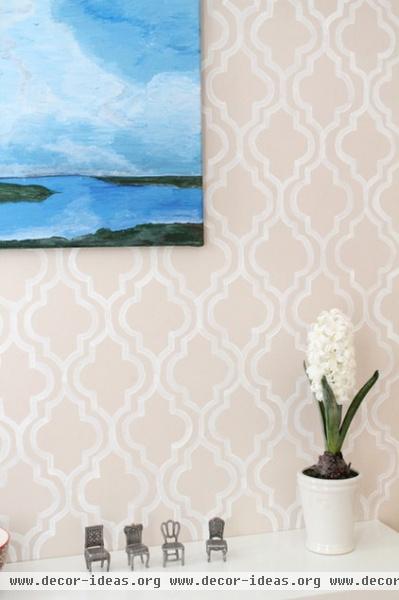
After cutting out the pattern, I began drawing it on my wall with a pencil. I started at the far-right corner and traced up the entire wall. This way the corner of the wall, where the pattern would be most visible, lined up perfectly. As I continued, I traced once and then moved the stencil over and up. This created a pattern similar to the tile pattern I loved, complete with the spaces to mimic the grout lines between the tiles.
After my tracing was complete, I painted between the pencil lines using a high-gloss white paint. I traced a bit, then painted a bit. I wanted to see some progress to make sure I really liked it!

I chose a paintbrush that was the width of the brushstroke I was looking for. I found out through trial and error that a brush with short bristles works better than a brush with longer bristles, as it offers more control — especially with the curves. (The brush on the left is the one I began with; the one on the right is the one I ended up using instead.) The shorter bristles also made for a cleaner end stroke. I actually found this brush in the children’s arts and crafts section at Target!
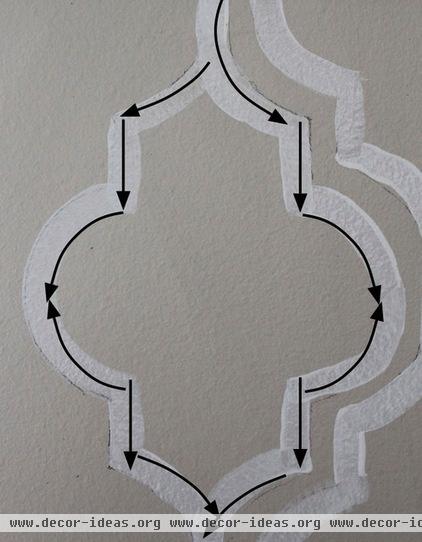
The best way to get perfect lines is to paint in the direction of the arrows shown here. That way each corner will have a crisp, clean edge, because each one is a new stroke created by the end of the brush. Practice on another surface if you are nervous about working on the wall. When I made mistakes, I just wiped them off quickly and began again. The more I painted, the better I got.
I found the painting easier than making the pencil marks. Once all the painting was done, I erased all the visible pencil marks. I cleaned up any smudges left by the eraser with a Mr. Clean Magic Eraser.
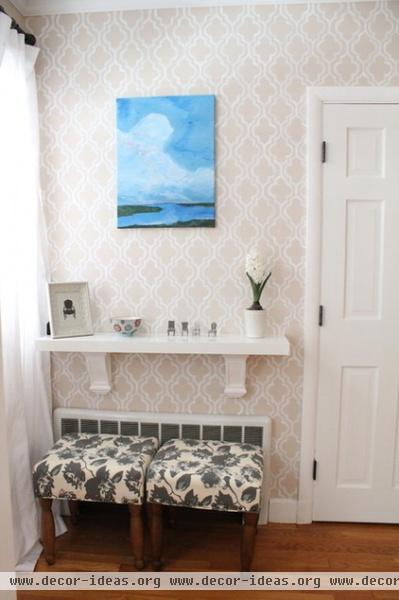
The results aren’t perfect. But the effect this pattern has on this small space is tremendous. I have also received many compliments on my new “wallpaper”!
More: Can’t Find the Right Wallpaper? Make Your Own
Related Articles Recommended
Related Images Recommend