Pocket Hole Joinery, the Beginning Woodworker's Best Friend
Two of the more traditional joinery methods — mortise and tenon, and dowels — require a lot of skill, expertise, time and tools. With pocket hole joinery, you simply cut boards to size, drill a few holes and put them together.
Pocket hole joinery is similar to toe nailing, which is how wall studs are joined in framing a home. Using a stepped drill bit, you drill a pilot hole into a board at a set angle and depth, forming an oval-shaped "pocket." Then you simply drive a pocket screw through the pilot hole and into the connecting board. It's ideal for beginning woodworkers.
That being said, it is also used quite a bit by professional cabinet shops in cabinet-box and face-frame construction. Why so popular with this group? The labor time saved, of course, but also because of the strength of the joints. Pocket hole joinery is plenty strong for most applications, especially when combined with gluing. Unless you want to create a project that can be taken apart and reassembled, I always recommend applying glue to the mating surfaces during assembly.
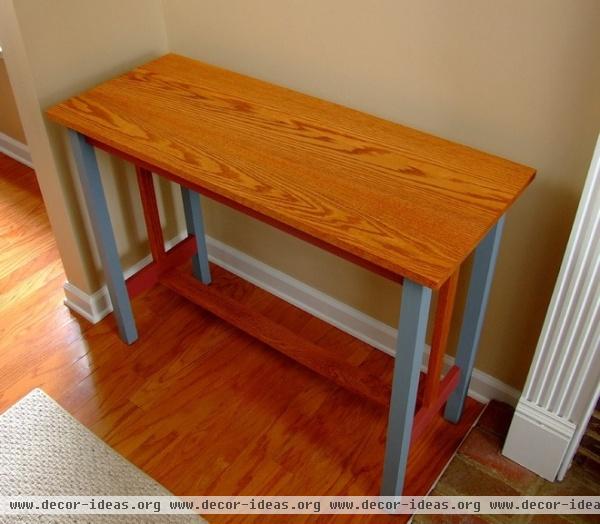
With the exception of the glued-on top panel, this hall table was built exclusively using pocket hole joinery.
As you'll see in the next few illustrations, pocket holes leave a large opening, which can be a challenge to conceal. In most cases you can simply place them where they will be hidden, such as the inside of a cabinet.
In other situations they will be exposed. Then you can either fill the holes with wood filler or insert pocket hole plugs. These plugs are available in a variety of wood species, so you can match them to the project.
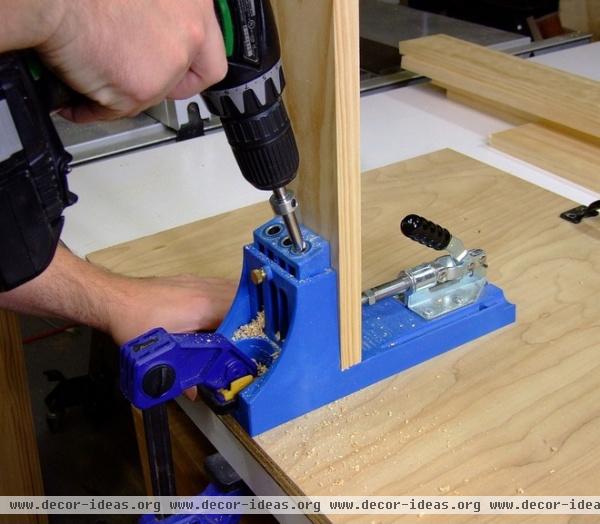
This Kreg Jig is a type of pocket hole jig. It clamps the board in place while the pocket hole is being drilled. It has several settings, from ½-inch-thick boards to 1½-inch-thick boards. The jig settings, as well as the stop collar on the drill bit, must be set to match the board thickness.
Pocket hole screws also are sized to match the thickness of the board. For example, 1¼-inch screws are used for joining to ¾-inch thick (or 1-by) boards, and 2½-inch screws are used for 1½-inch boards.
You may be scratching your head, wondering how a screw longer than the thickness of the board can be used, but the answer will be clear after the next few illustrations.
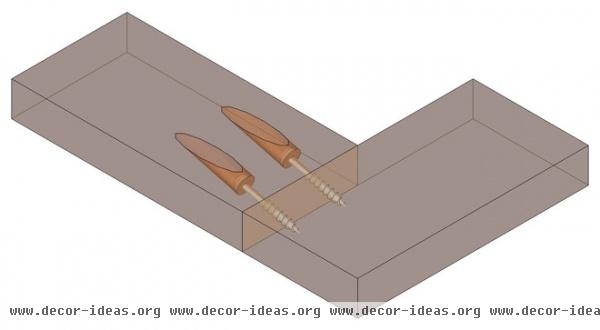
The pocket hole screws are driven through the pilot holes and into the mating board. Here the end of one board has been joined to the edge of another.
While you're driving the screws, it's important to clamp the boards in place to keep the boards from shifting; otherwise you can alter the trajectory of the screws as they are driven. Preventing shifting helps keep the boards perfectly flush during assembly.

The head of the screw stops at the bottom of the pocket hole, limiting how far the screw is driven into the mating board. However, if the torque of the drill is set too high, the screw can be driven deeper, which results in the mating board's splitting.
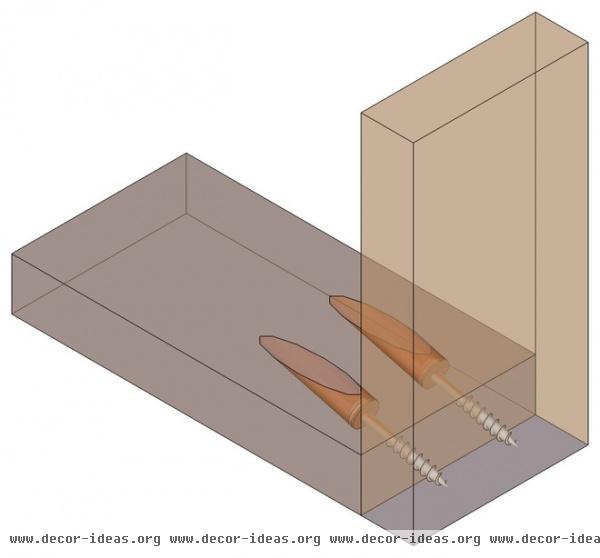
Here the end of one board is joined to the face of another at a right angle. The correct setting of the pocket hole jig is especially vital in this application.
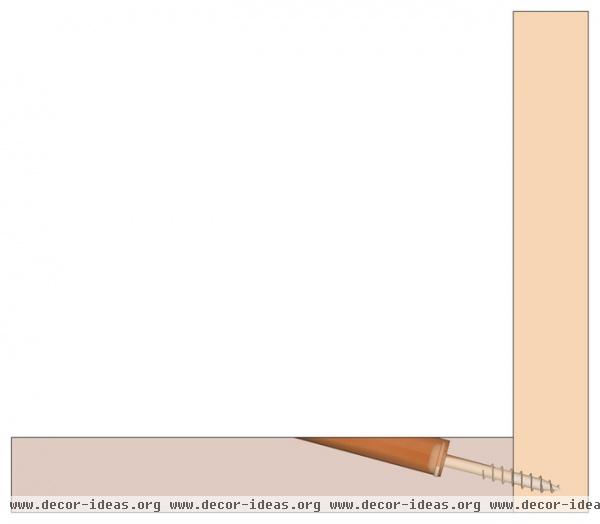
Which brings us back to the question of screw length and board thickness. Notice how far into the board the pocket screw goes? The hole depth, combined with the angle, allows the screw to penetrate deep enough to create a strong joint, but not so much as to compromise the integrity of the board.
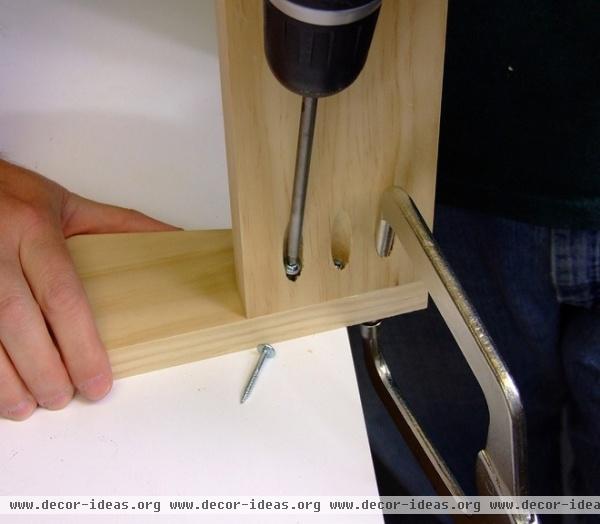
During assembly of this particular pocket hole joint, a right-angle locking clamp helps secure the two boards. This clamp is designed so that one side of the jaw fits perfectly in the pocket hole. The other side of the jaw has a flat metal disc.
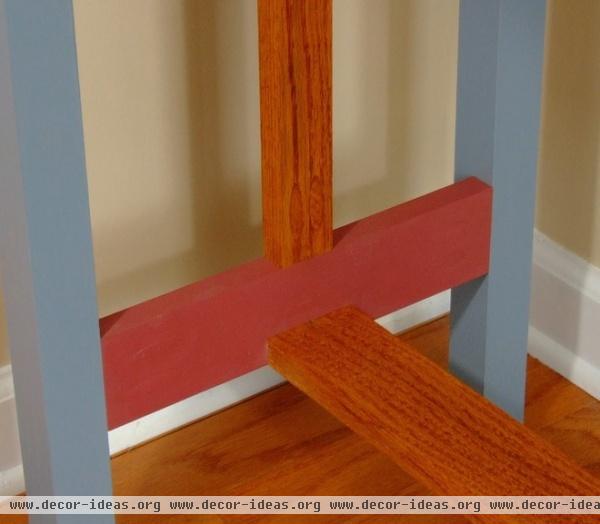
This photo highlights four areas of pocket hole joinery on the hall table project.
The stretcher (stained and in the foreground) is attached to the bottom rail (red), with the pocket holes facing downward.
The bottom rail is attached to the legs (blue), with the pocket holes facing inward. These have been filled with pocket hole plugs, sanded smooth, and painted.
The end stile (stained and in the background) is attached to the bottom rail. The pocket holes are facing inward. If you look carefully, you can make out the pocket hole plugs. These must be either cut or sanded flush after being inserted into the pocket holes.
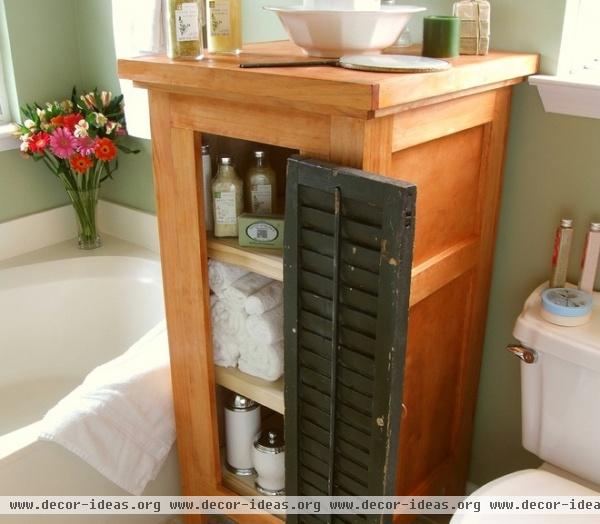
Building a huge variety of projects is very attainable with this method, even for beginners. For example, the framing of this storage cabinet is assembled solely via pocket hole joinery. The holes are placed on the inside of the project so they remain undetected, and this piece will last for many years to come.
More projects for the beginning woodworker


