Neat Little Project: Make a Mini Wooden Wall Console
http://decor-ideas.org 09/19/2013 16:30 Decor Ideas
A wall-mounted console can be handy in many ways, from simply being another place to set down stuff to being a charging station for phones and tablets. It even fits nicely on a wall next to a bed. Consider this project something that creates a little space where you might not expect it.
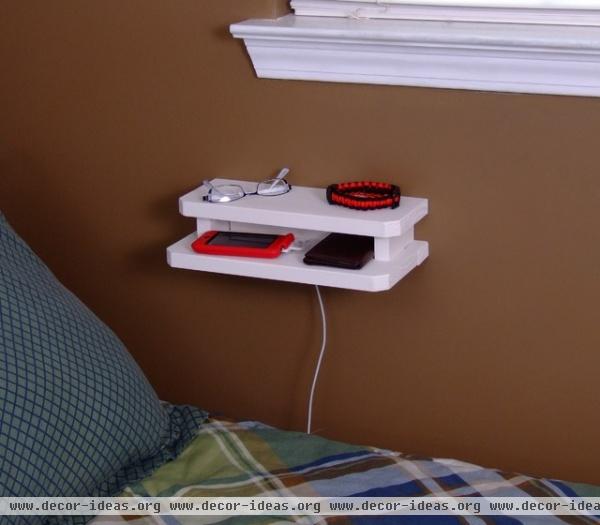
This console measures 12 inches wide, 3 inches high and 6 inches deep.
Materials:(1) 1-by-6-by-4 pine board(1) 1-by-2-by-4 pine board(1) ¾-inch square dowel3-inch wood screws#18 x 1¼-inch bradsWall anchorsWood gluePrimer and paintTools:Table sawMiter sawJigsawDrill¾-inch Forstner or spade bit, and a #12 countersink bitHammerMeasuring tapeSquareLevelPaintbrushes
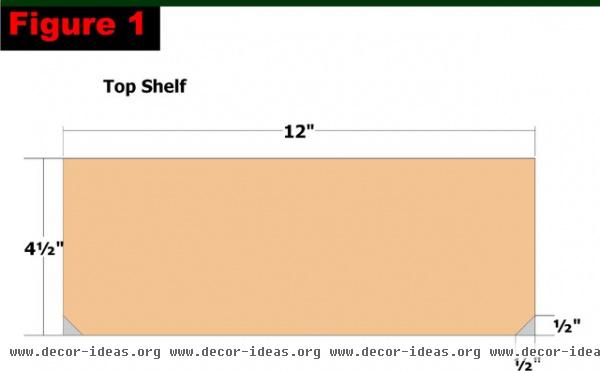
Make the Top Shelf
Using a table saw, rip the 1-by-6 board to 4½ inches wide. Use Figure 1 as a guide for cutting the top shelf to length (12 inches) and for cutting the mitered corners. Cut the corners at 45 degrees.
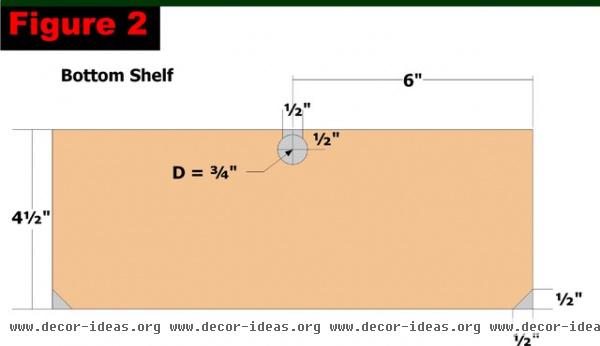
Make the Bottom Shelf
Cut the bottom shelf from the ripped 1-by-6 board to 12 inches long. Drill a ¾-inch hole (using a ¾-inch Forstner or spade bit) 6 inches from the end and ½ inch from the edge as shown in Figure 2. Use a jigsaw to cut a ½-inch-wide slot leading to the hole. This slot will be used as a pass-through for cords for electronics. if you do not plan to use the console this way, you can bypass this step.
Cut the 45-degree miters on the corners on the opposite side of the board from where the hole is located..
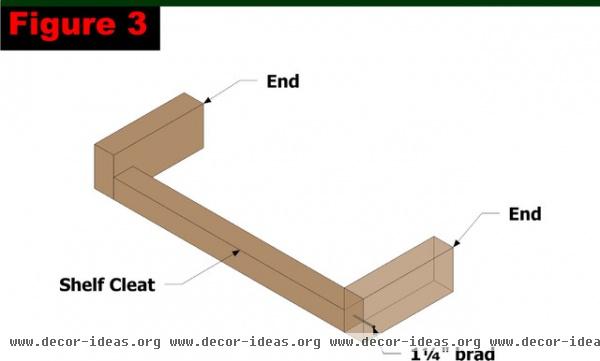
Assemble the Shelf Cleat and Ends
Cut the shelf cleat from the ¾-inch square dowel to 9 inches long. Cut the ends from the 1-by-2 board to 3½ inches long. Position the parts as shown in Figure 3 after applying glue to the ends of the shelf cleat. Attach using 1¼-inch brads.
Sand the inside edge of the shelf cleat until it is slightly rounded.
Attach the Top Shelf
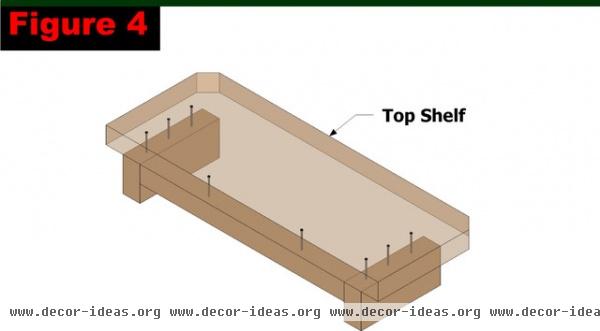
Apply glue to the edges of the ends and wall cleat. Position the top shelf centered on the shelf cleat assembly and flush against the wall cleat (there will be a ¾-inch overhang beyond the ends) as shown in Figure 4, and attach it using 1¼-inch brads.
Prime and paint this assembly (with the exception of the bottom edge of the ends) and the bottom shelf.
Attach the Bottom Shelf
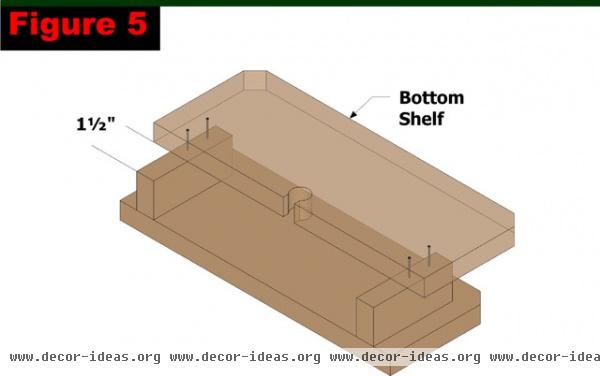
Apply glue to a 2-inch section on the ends farthest from the back (where the wall cleat is located). Position the bottom shelf 1½ inches from the back of the assembly (on this glued area) as shown in Figure 5, and attach it using 1¼-inch brads.
Assemble the Wall Cleat and Wall Cleat Support
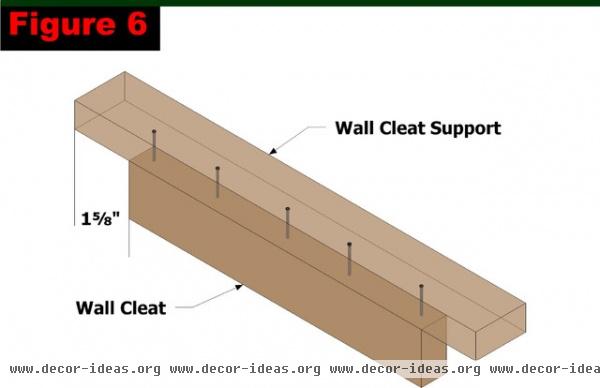
Cut the wall cleat from the 1-by-2 board to 8¾ inches long. Cut the wall cleat support from the 1-by-2 board to 12 inches long. Apply glue to an edge of the wall cleat, position it as shown in Figure 6 and attach it using 1¼-inch brads.
Sand the top edge of the wall cleat until it is slightly rounded. This will help with placing the shelf assembly onto the wall cleat assembly.
Prime and paint this assembly.
Attach the Wall Cleat Assembly to the Wall
Select the desired location for the console. Use a #12 countersink bit to drill pilot holes for 3-inch screws in the wall cleat support.
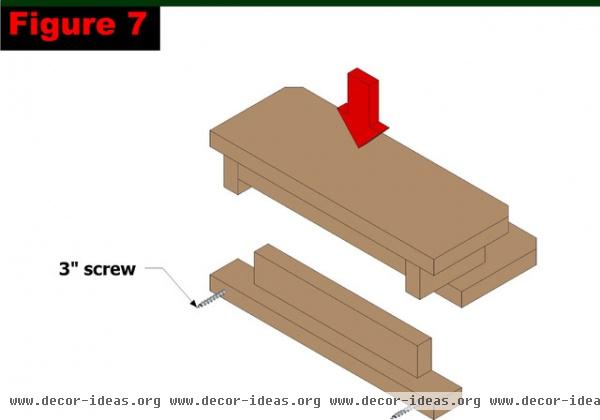
Position the wall cleat assembly on the wall and use a level to make sure it is level. Slowly drive the 3-inch screws through the wall cleat support until they just enter the wall, creating small divots. Remove the assembly and drill pilot holes for wall anchors for the screws. Insert the wall anchors in the holes and then attach the wall cleat assembly to the wall by driving the 3-inch screws through the assembly and into the wall anchors.
You can now place the shelf assembly on the wall cleat assembly. If you find it a bit tight, then back out the screws slightly until it fits.
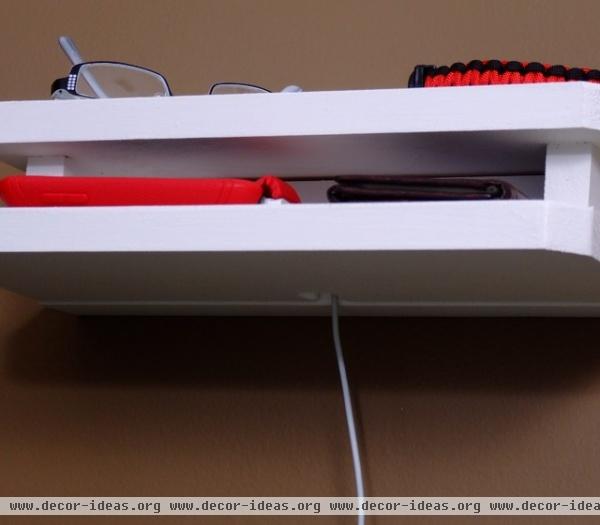
If you're placing charging cords with wide connectors (such as for iPods) in the assembly, insert the cords in the slot prior to placing the shelf assembly on the wall cleat assembly.
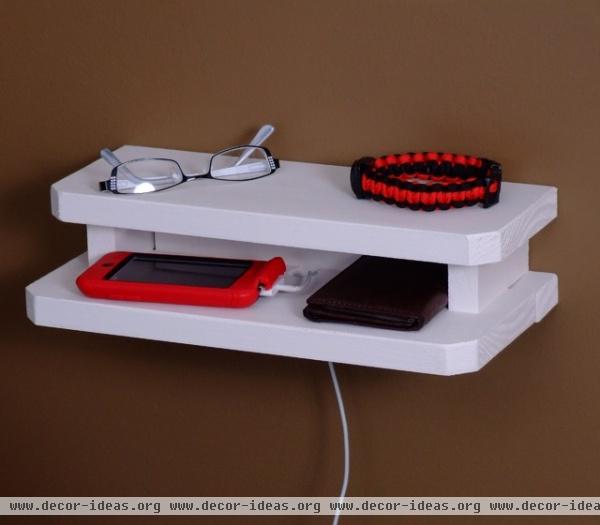
Here's the finished console in action.
Related Articles Recommended


