Neat Little Project: A Wooden Planter to Hang Anywhere
http://decor-ideas.org 08/27/2013 22:30 Decor Ideas
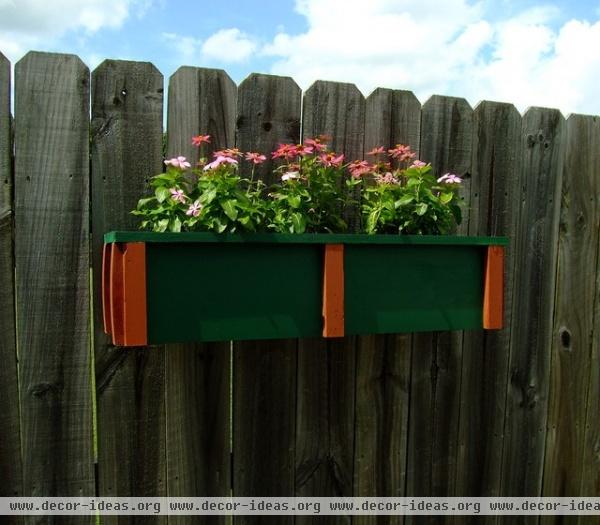
You'll recognize this project as a simple window box, but you shouldn't limit it to just a window. This planter can go in any spot where you can drive a few screws in, be it a wooden fence (as shown here), a blank wall or near that window.
If your outdoor space is a balcony and you don't want to mount it there, you can simply set it on the balcony floor, where it can get the best sunlight. (Check local codes first if you live in a multiunit building.) It's large enough that you can grow herbs in it, or you can fill it with seasonal flowers of your choice.
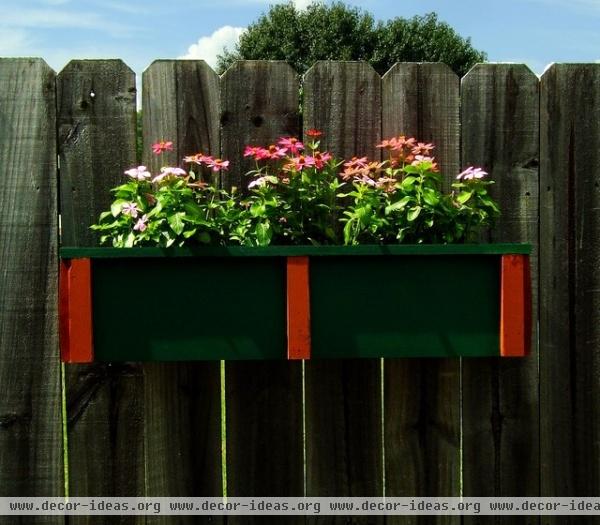
This planter box measures 33 inches wide, 8 inches high and 10¼ inches deep.
Materials:(2) 1-by-8-by-8 cedar boards(1) 1-by-4-by-8 cedar board(2) 1-by-2-by-8 cedar boards(1) 2-by-2-by-8 cedar board1⅝-inch deck screws1¼-inch deck screws#18 x 1¼-inch galvanized bradsExterior wood gluePaint or solid exterior stain Tools:Table sawCircular saw or miter sawDrill or driverMeasuring tapeSquareLevelPaintbrushes
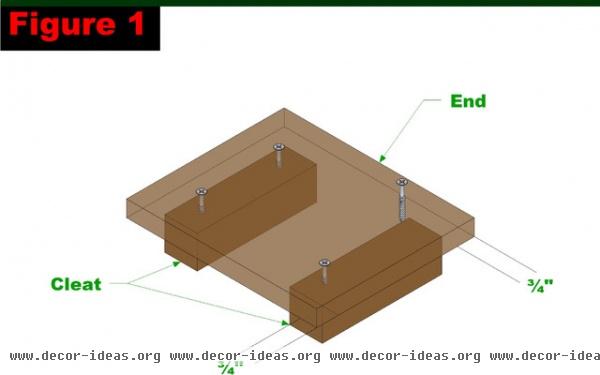
Create the End Assemblies
From the 2-by-2, cut the cleats (four total) to 5½ inches long. From the 1-by-8, cut the ends (two total) to 8¾ inches long.
Apply glue to one face of the cleats and position them as shown in Figure 1. Attach the ends to the cleats using 1⅝-inch deck screws.
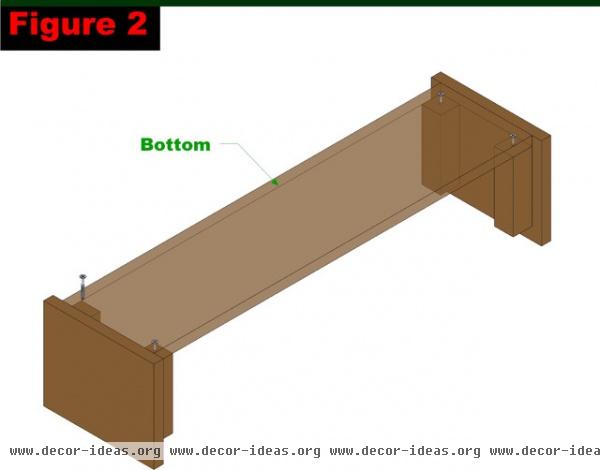
Attach the Bottom
From the 1-by-8 cut the bottom to 30 inches long.
Position the end assemblies so the ends of the cleats that are ¾ inch from the edge of the ends are facing up. Apply glue to those ends of the cleats and place the bottom as shown in Figure 2. Attach the bottom to the cleats using 1⅝-inch deck screws.
Drill several ¼-inch drain holes in the bottom.
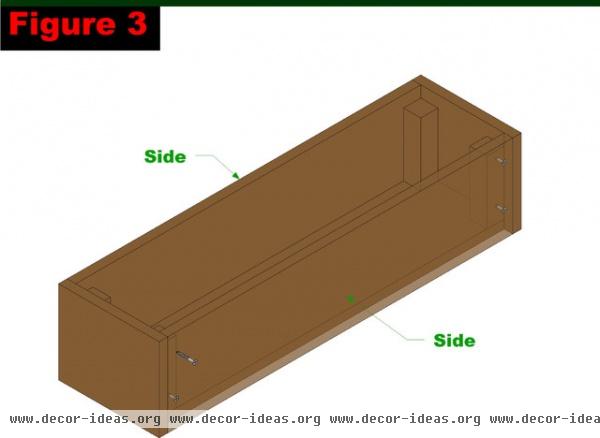
Attach the Sides
From the 1-by-8, cut the sides to 30 inches long.
Apply glue to the outside edges of the cleats and bottom, and position the sides as shown in Figure 3. Attach the sides to the cleats using 1⅝-inch deck screws. Drive a couple of #18 x 1¼-inch galvanized brads through the sides and into the bottom as well.
Attach the Stiles
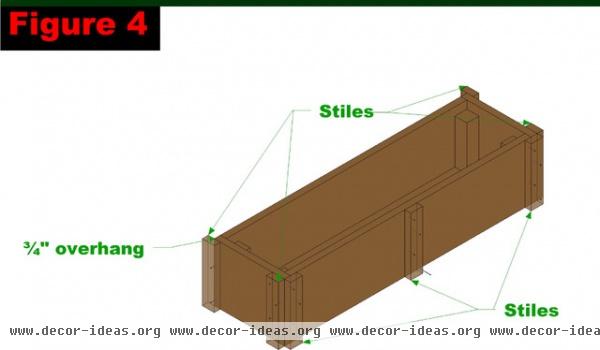
From the 1-by-2, cut seven stiles to 7¼ inches long.
Apply glue to one face of the stiles and position the stiles as shown in Figure 4. Position one stile centered on one side as shown. The two back stiles should overhang the edge of the assembly by ¾ inch. The remaining stiles are placed flush with the front corners of the assembly as shown. Attach using #18 x 1¼-inch galvanized brads.
Create and Attach a French Cleat
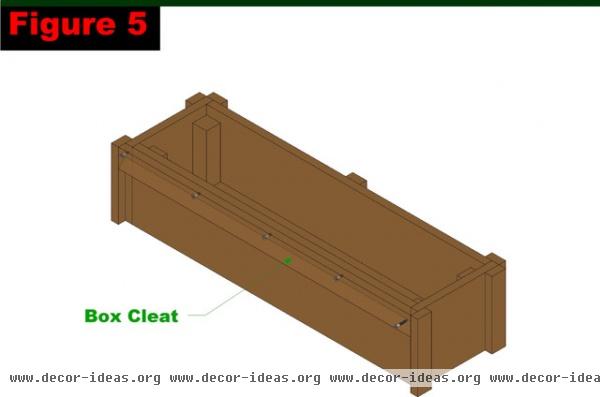
A French cleat is essentially two interlocking boards that have been cut along their length at 45 degrees. Many cabinets are attached to walls with a French cleat, as it is sturdy and can support a lot of weight.
Mark a centerline across the end of the 1-by-4 board. Mark the center point of this line and draw a 45-degree angle that bisects this center point.
Set the saw blade on your table saw at 45 degrees, then set the fence on your table saw so that the 45-degree mark lines up with the saw blade. Rip the 1-by-4 into two long pieces, creating two interlocking boards — one for the planter box, the other for the surface to which you plan to mount it. Cut the box cleat to 31½ inches in length and the mounting cleat to 29½ inches in length.
Position the box cleat (with the point away from the assembly) flush against the side without the centered stile and attach it using 1¼-inch deck screws.
Attach the Trim
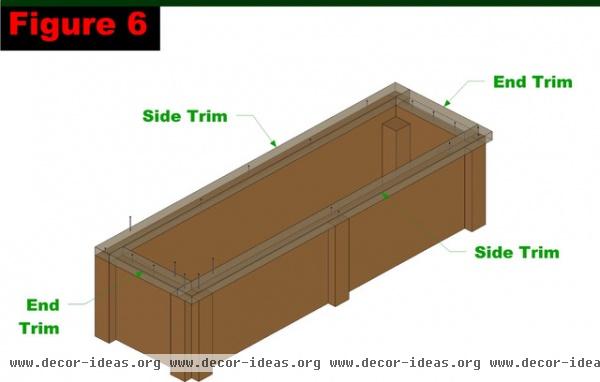
From the 1-by-2, cut the two pieces of end trim to 7¼ inches long and the two pieces of side trim to 33 inches long.
Apply glue to the top of the assembly (sides, ends, stiles and box cleat). Position the side trim flush with the outer edges of the assembly and the end trim flush with the ends of the side trim. Attach the pieces using #18 x 1¼-inch galvanized brads.
Paint the box as desired.
Mount the Planter Box
Use a level to position the mounting cleat level on your desired mounting surface. Here the box is mounted on a wood fence, so the mounting cleat was attached to the fence using 1¼-inch deck screws.
To mount on other surfaces, you will need to match the fasteners to the surface — for example, masonry screws for concrete or brick walls.
Simply place the box by hooking the box cleat onto the mounting cleat.
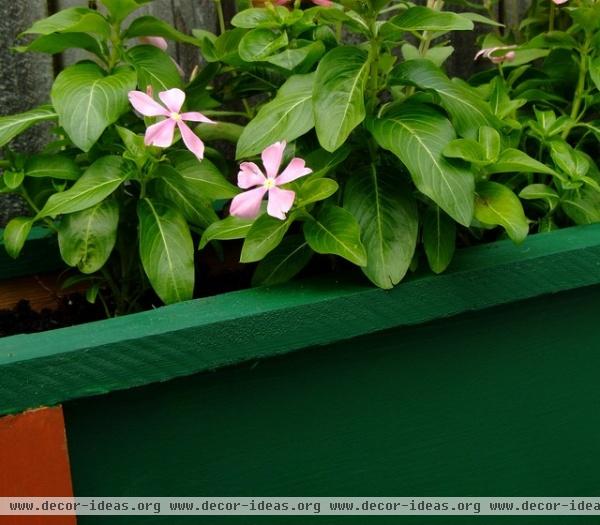
Fill 'Er Up
Depending on your situation and how high you mount the box, you may fill it either before or after mounting it. You'll need slightly less than 1 cubic feet of soil.
What you need to know about potting soil
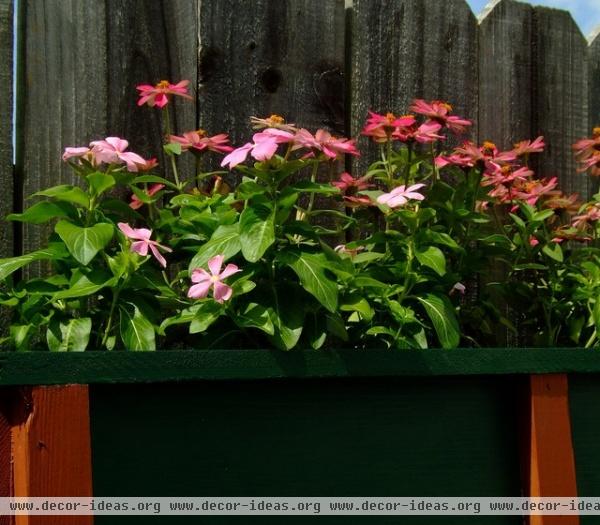
Select the plants for your box depending on the amount of sun (hours per day) the location will receive.
More: The secret to grouping plants in a pot
Related Articles Recommended


